As we rely more and more on technology, it’s become crucial to know how to detect and prevent vulnerabilities. This is where ethical hacking comes in handy, as it allows us to take a proactive approach to finding vulnerabilities and implement measures to protect ourselves against potential security breaches.
In this post, I’ll show you how to create a virtual hacking lab at home. You can build this hacking lab for free, with the only investment being some of your system’s processing power and your time. With this lab, you can develop your skills in penetration testing by practicing with different exploits, tools and techniques.
Quick Summary
System Requirements
- Storage: 170GB – 200GB of free space
- RAM: 16GB
Machines
- Kali Linux
- Windows Server 2019 (Domain Controller)
- Windows 10
- Ubuntu 20.14
Why these machines?
The Domain Controller lets us set up an Active Directory network at home which is a huge part of penetration testing. The Windows 10 machine is for windows privilege escalation and the Ubuntu 20 is for Linux privilege escalation. The Windows 10 and Linux machines are also part of the Active Directory network so it kind of simulates what a real network would look like.
Network setup
This part is important because proper network setup will let us practice tunneling techniques making the lab more realistic.
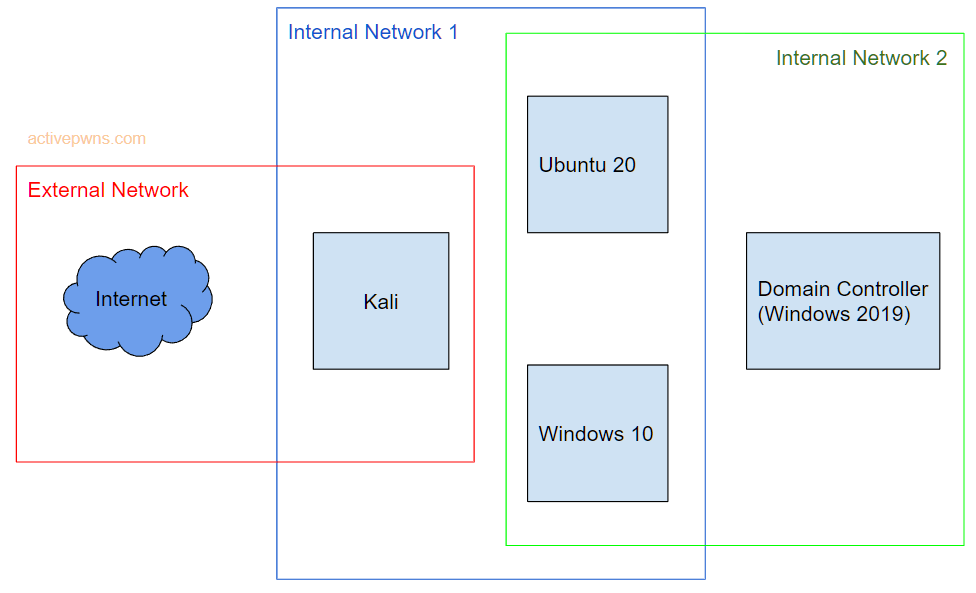
- Domain Controller (internal network 2)
- Windows 10 (internal network 1 and internal network 2)
- Ubuntu (internal network 1 and internal network 2)
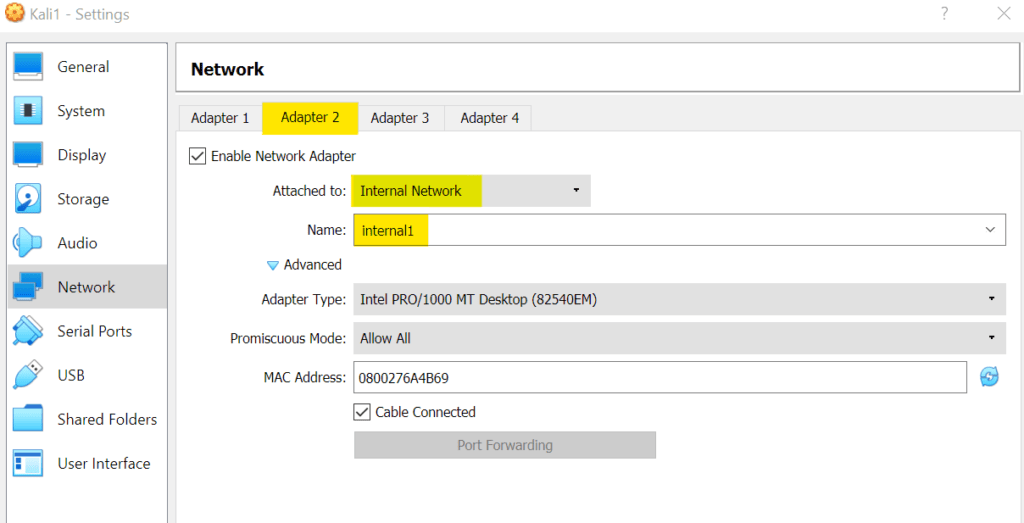
- Kali (Nat Network, internal network 1)
The network is setup so that the attacker needs to compromise either the Windows or Linux machine before attempting to attack the Domain Controller.
VirtualBox
I like to use VirtualBox because I never had any problems with it in the past but VMware is also completely fine to use.
Download VirtualBox from here
Setting up the Network
Creating the NAT and Internal Networks
To create the Internal networks do the below.
Open up CMD prompt on your host and go to “C:\Program Files\Oracle\VirtualBox”. Then type this
VBoxManage dhcpserver add --netname internal1 --ip 192.168.4.1 --netmask 255.255.255.0 --lowerip 192.168.4.2 --upperip 192.168.4.254 --enable
Command Explaination:
- –netname sets the name of the internal network
- –ip
- –netmask sets the netmask
- –lowerip sets the how low the DHCP server will start giving out IPs
- –upperip sets the how high the IPs will go
Repeat this for internal network 2. Make sure to name it something different and also choose a different subnet (for example: 192.168.5.1/24)
You can check if the internal networks got created but keep in mind that it will only show up once you actually add a virtual machine to the internal network which we will do later. But if you’ve done that part, you can come back here and check using:
VBoxManage list intnetsNext, we have to create the Nat network
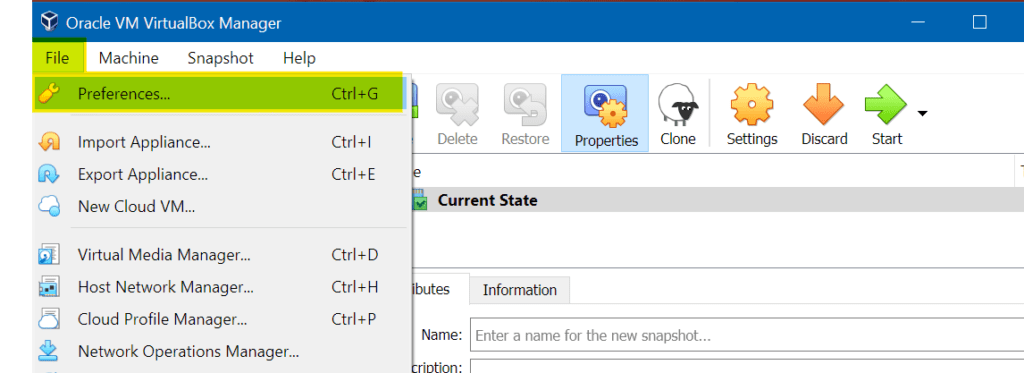
Open VirtualBox and click on File at the top left, then click preferences
Select Network and then click Add new NAT Network on the right
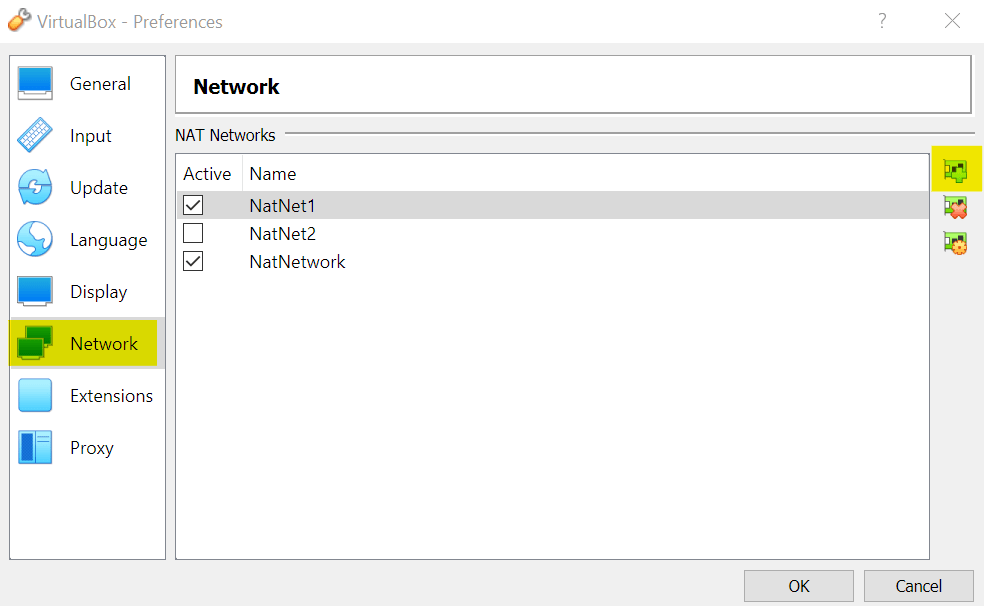
This will create a Nat Network that you can use for your virtual machines.
Why do we need these networks?
Internal network isolates the machines from your home network. This adds a layer of protection to these machines since they are vulnerable and could potentially be hacked.
NAT network allows the virtual machines to access the internet through the host machine’s connection, which can be convenient for certain testing scenarios.
The three Victim machines don’t have any internet connection. If you need to install something in those machines, you can quickly switch from an internal network to a Nat Network. However, our attacker machine (Kali) does have internet access through a NAT network, as it requires access to download and update the latest penetration testing tools and exploits.
Let’s move on to creating the virtual machines. We’ll use the networks we created later on.
Creating the Machines
Ubuntu
- Download the ISO file here
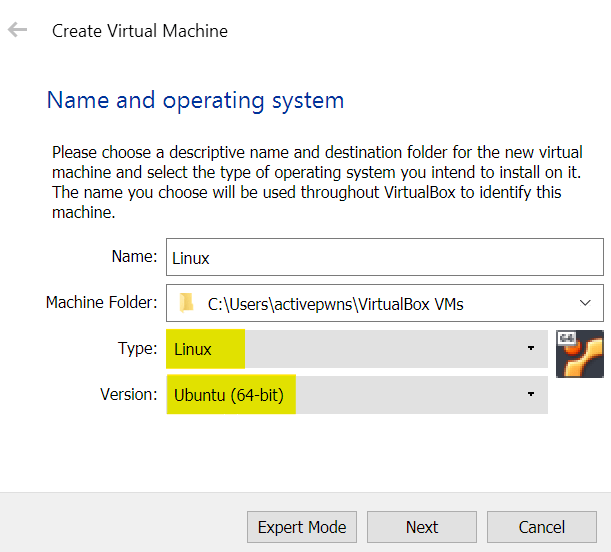
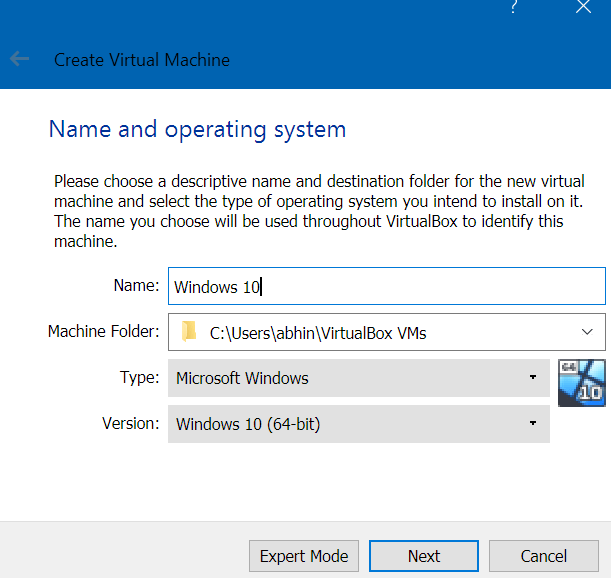
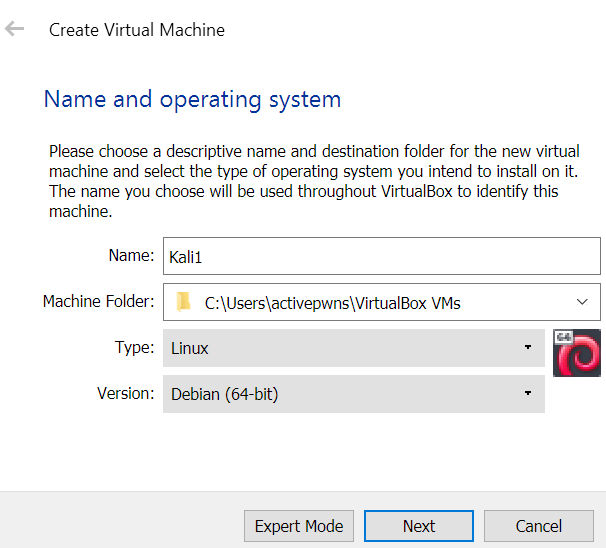
Open Virtual box and click on Tools at the top, then click NEW
Then choose these options
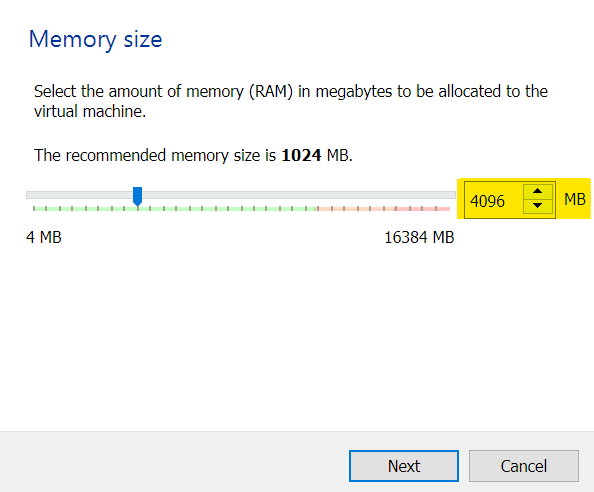
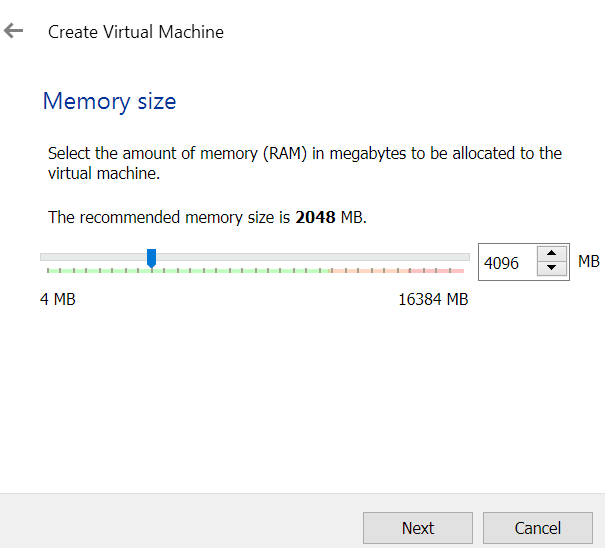
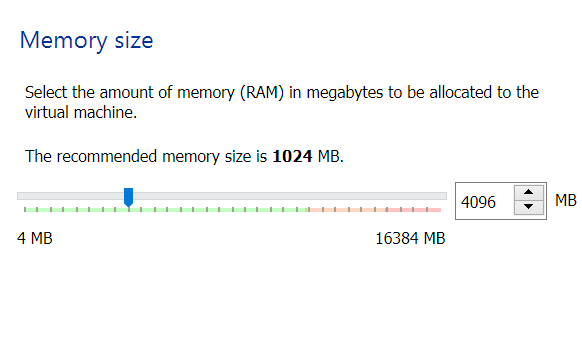
Choose how much RAM you’d like to allocate. I use 4GB for the setup of the machine and then I decrease it later.
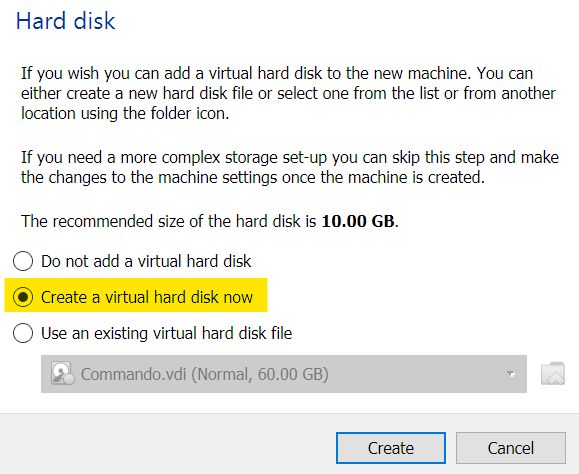
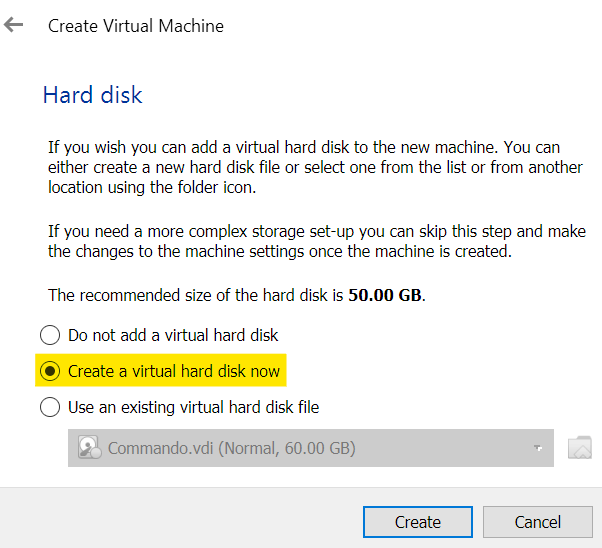
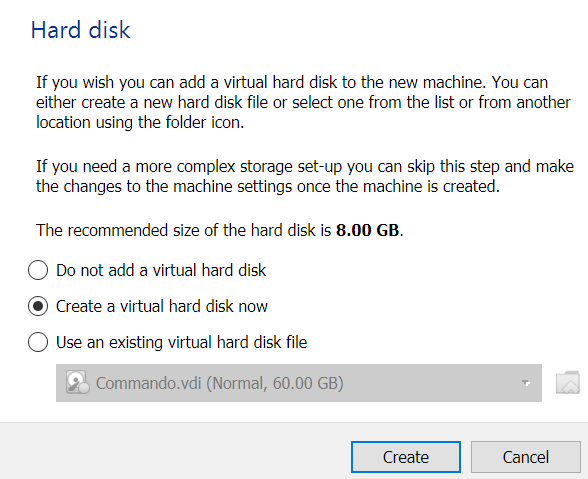
After that, choose “Create a Virtual Hard Disk now”
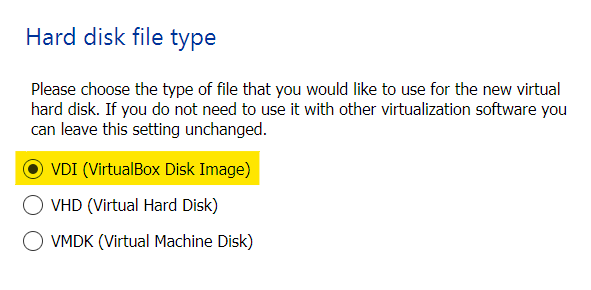
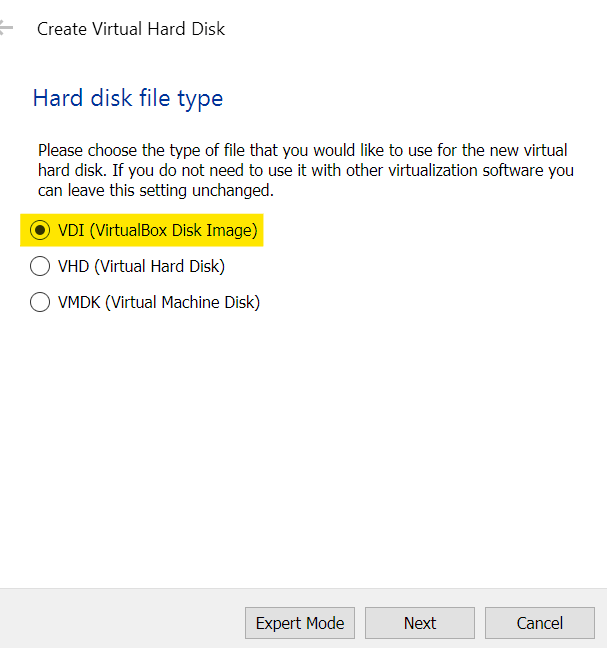
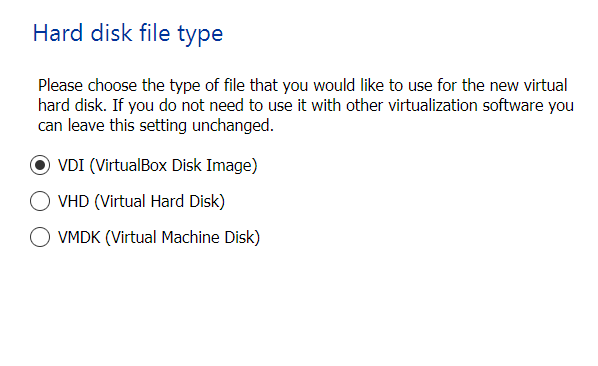
Choose “VDI (VirtualBox Disk Image)”
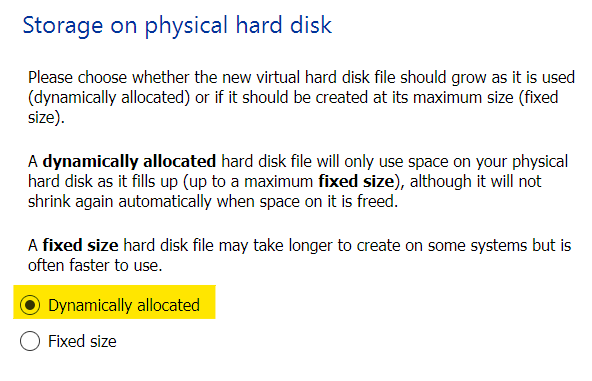
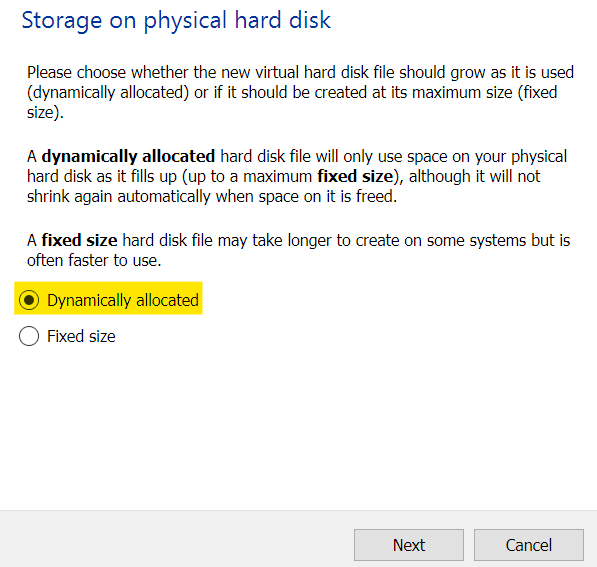
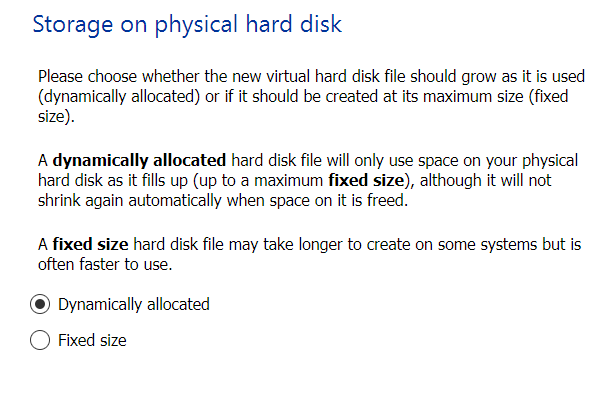
Then click on Dynamically Allocated
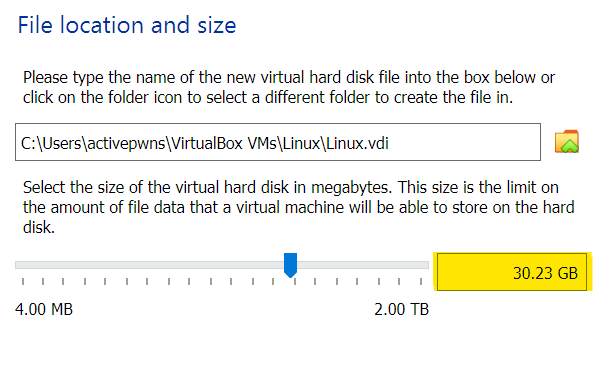
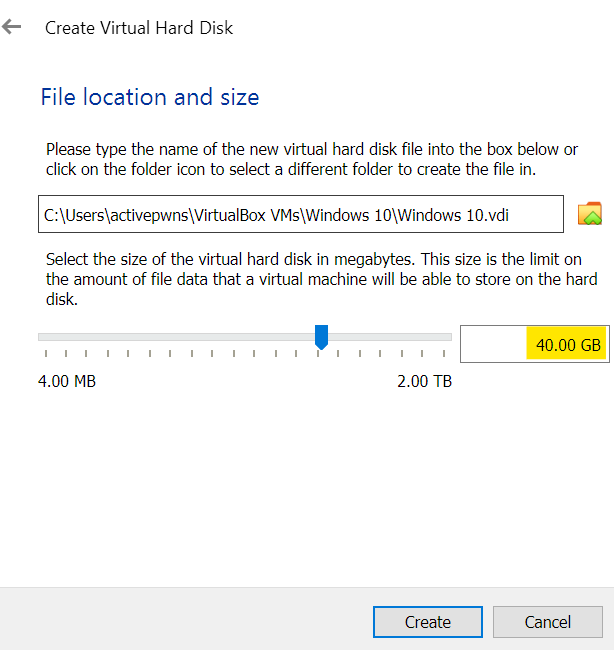
After that you’ll have to choose how much space you want to allocate to the machine. I like to choose 30GB since you can always add more.
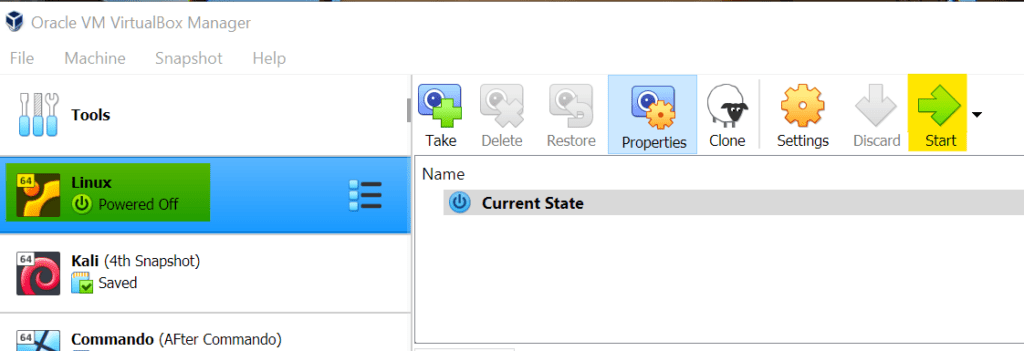
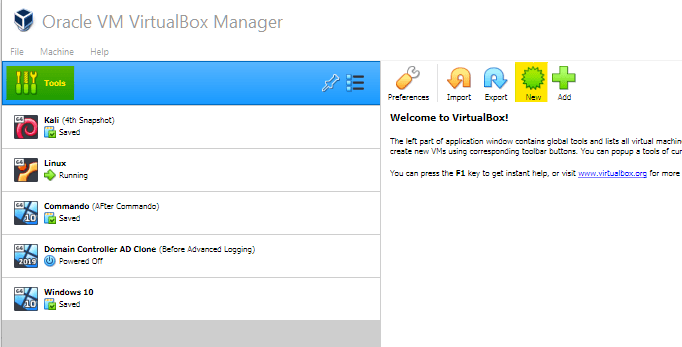
Now we see this screen. Click on the Linux machine you just created and then click “Start”.
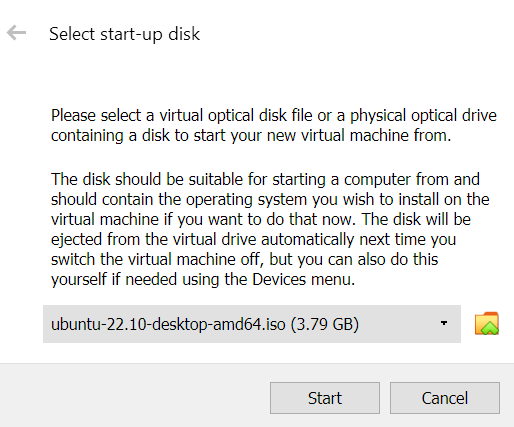
When you start the machine, you’ll see this screen. Click on the folder button and navigate to where you download the Ubuntu ISO file.
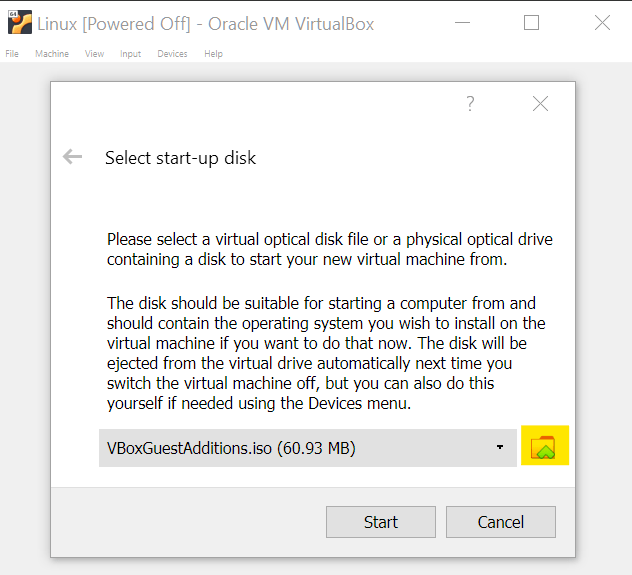
Once you choose the Ubuntu ISO, click start
After a couple of minutes it should start and ask bring you to this screen. Click on “Install Ubuntu”.
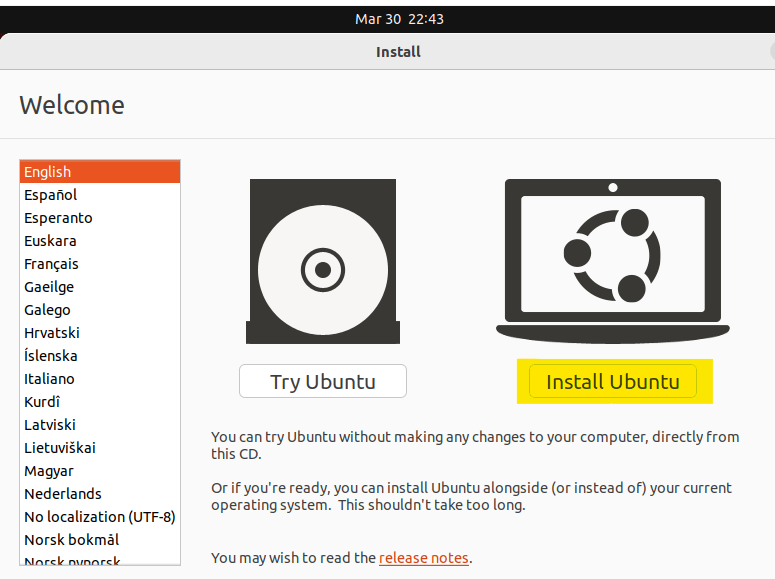
Choose your keyboard layout and then click continue
Click Continue again
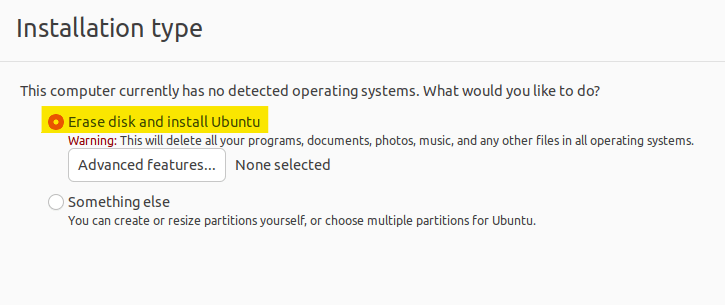
It should bring you to this screen. Here, choose “Erase disk and install Ubuntu”. After that, click “Install Now” at the bottom.
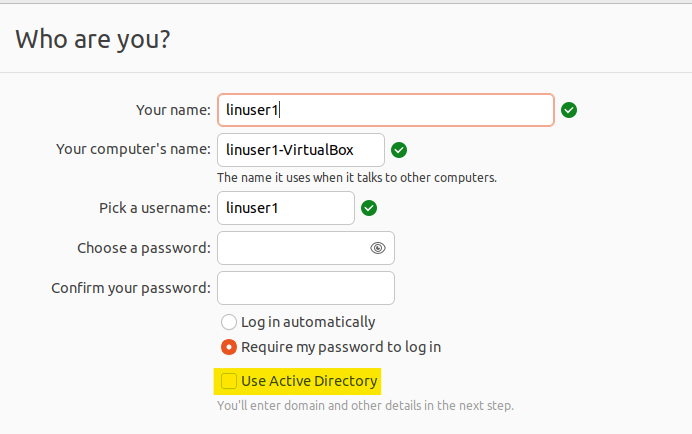
Then keep going through the install until you’re brought to this screen. Don’t select “Use Active Directory”, we can set that up later:
After its done installing and you can interact with it, create a snap shot.
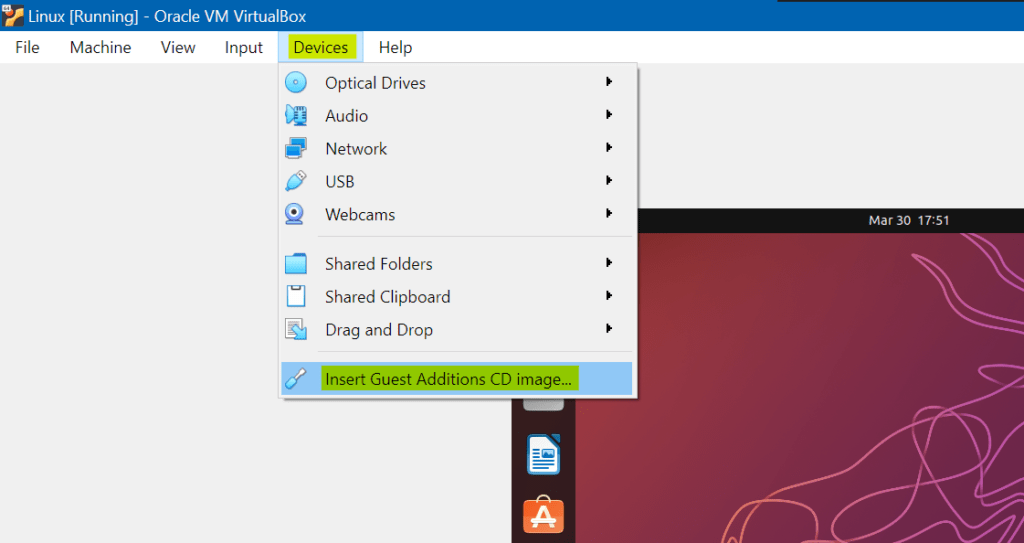
The Ubuntu machine’s screen probably looks small right now so lets fix that
Click “Devices” the top of the machine and click “Insert Guest Additions CD Image…”
Then open any folder and click on Vbox_GAs_… at the left side. Once it opens up the folder, right click any whitespace and click open terminal.
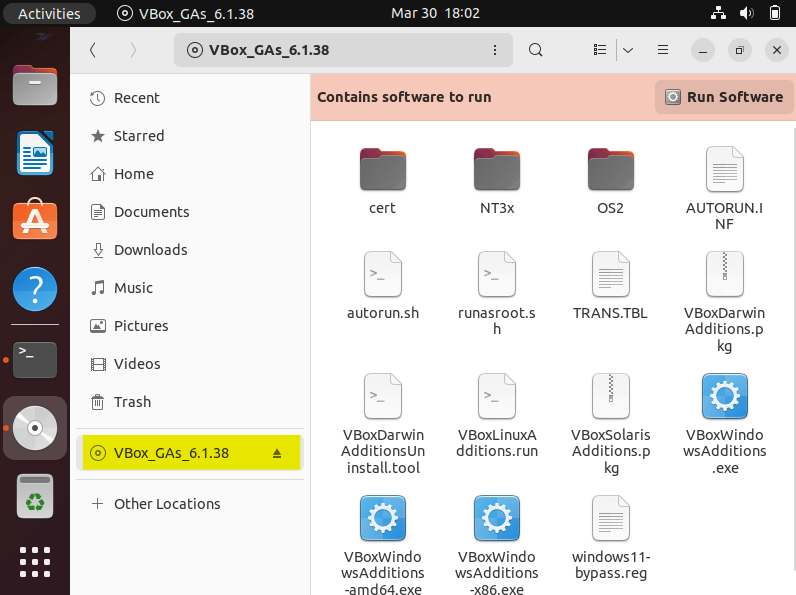
Once the terminal is open, run VBoxLinuxAdditions.run
sudo ./VboxLinuxAdditions.run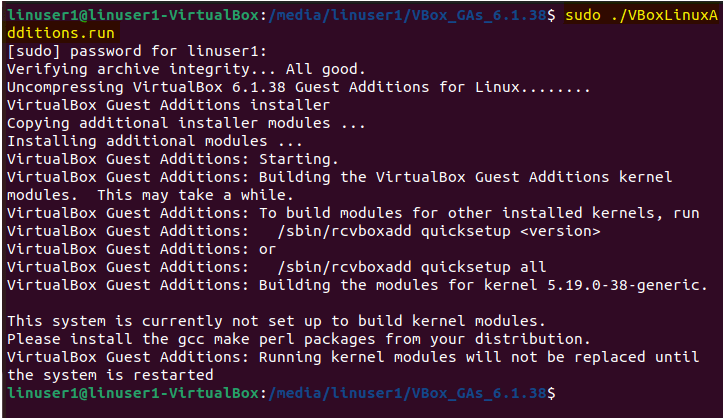
Once you run that, restart the ubuntu machine. It might be a little slow and buggy while starting up but it should be in full screen.
Setting up the network for Ubuntu
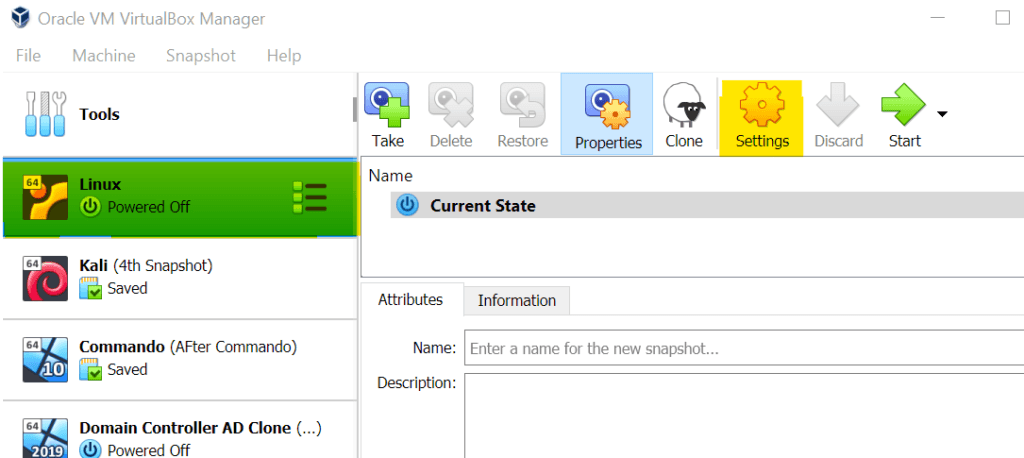
Make sure the machine is powered off
Click on the machine and click on settings
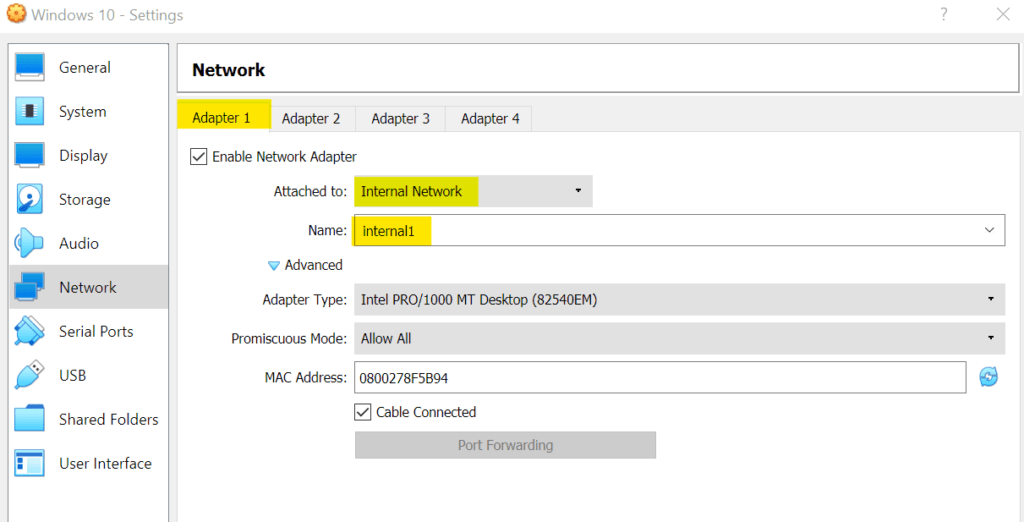
Go to Network and click “Adapter 1”. Choose “Internal Network” then set the name to whatever you named your first internal network

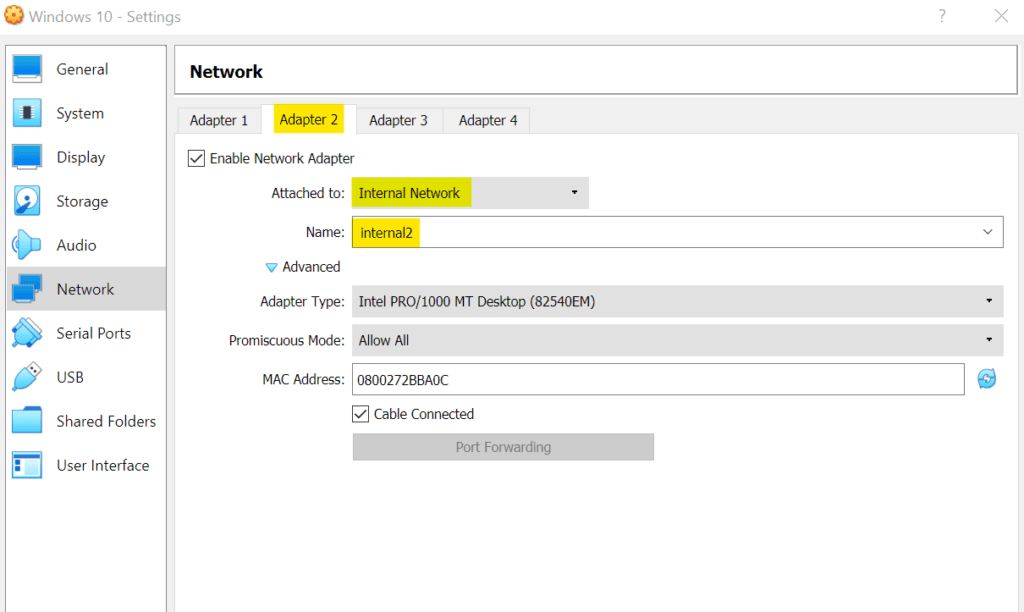
Next, click on Adapter 2 and set it to internal network. Name it whatever you named your second internal network.
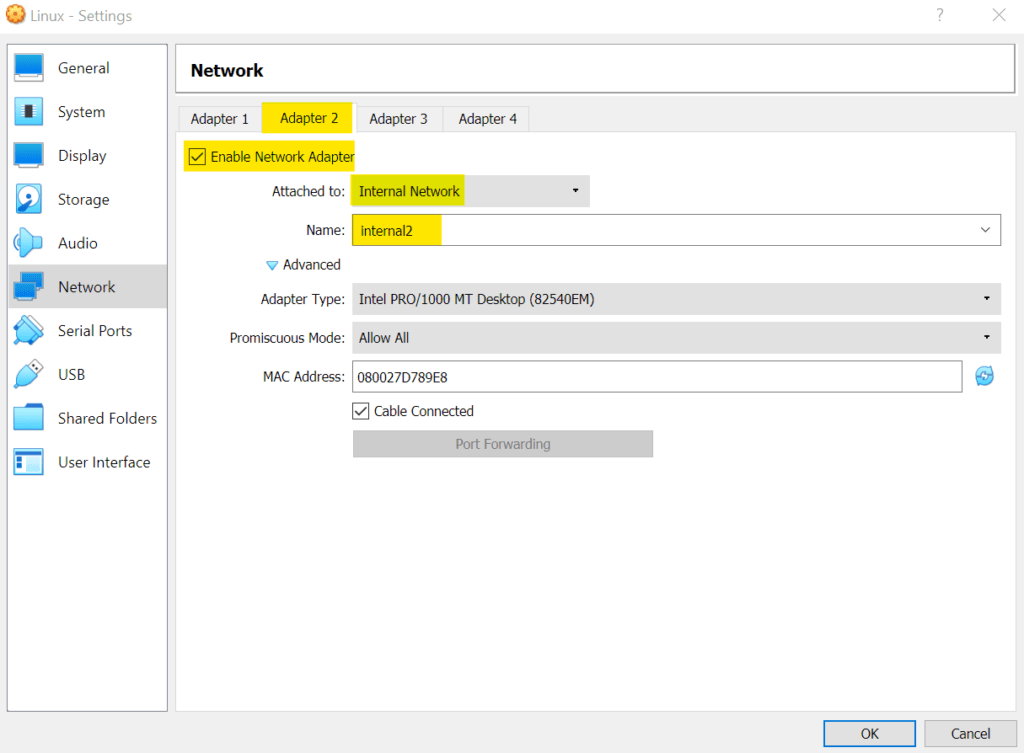
The machine won’t have any internet connectivity with this configuration. If you want the machine to have internet connection make sure to set one of the Adapters to Nat Network.
Domain Controller
Download the ISO file here
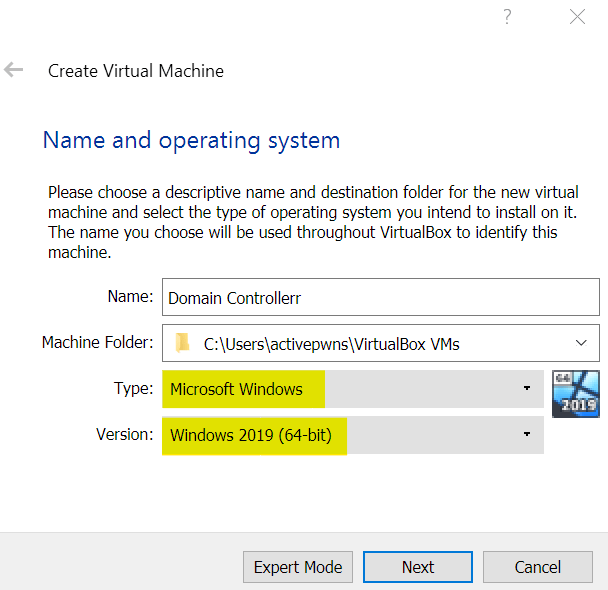
Open Virtual box and click on Tools at the top, then click NEW
Choose these options
Choose how much RAM you want to allocate, I use 4GB for the setup of the machine and then I decrease it later.
Choose “Create a virtual hard disk now”
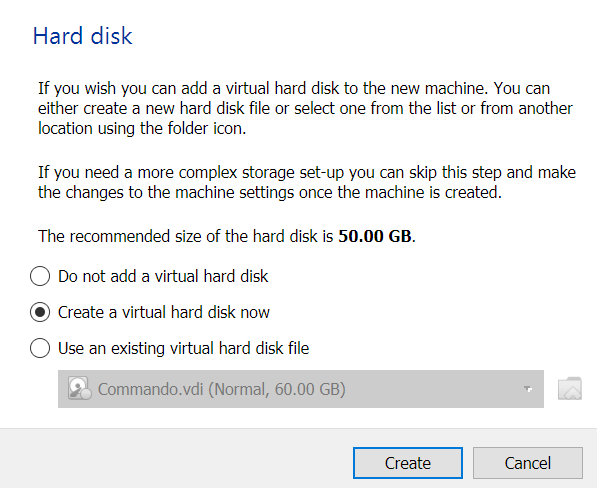
Choose “VDI (VirtualBox Disk Image)”
Click on Dynamically allocated
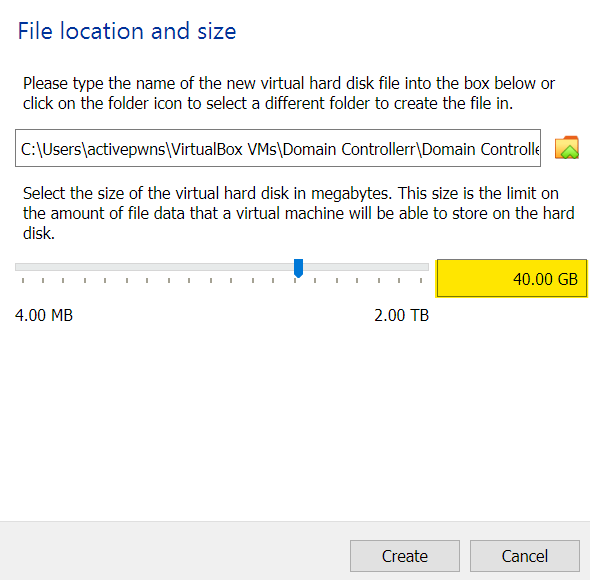
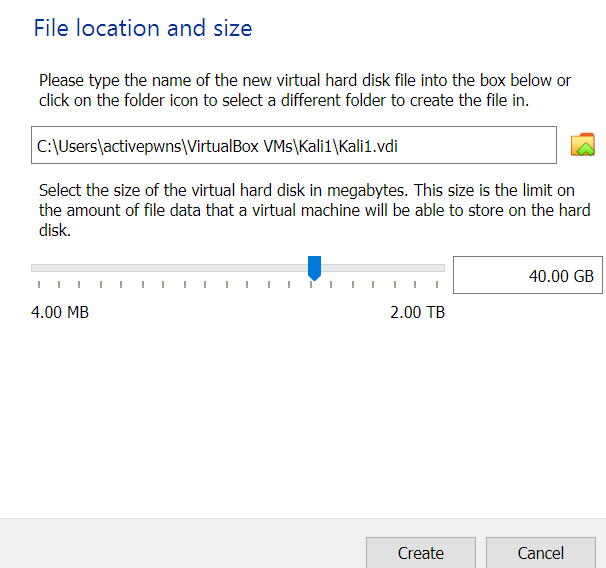
I set the size to 40GB for now. You can always increase it later.
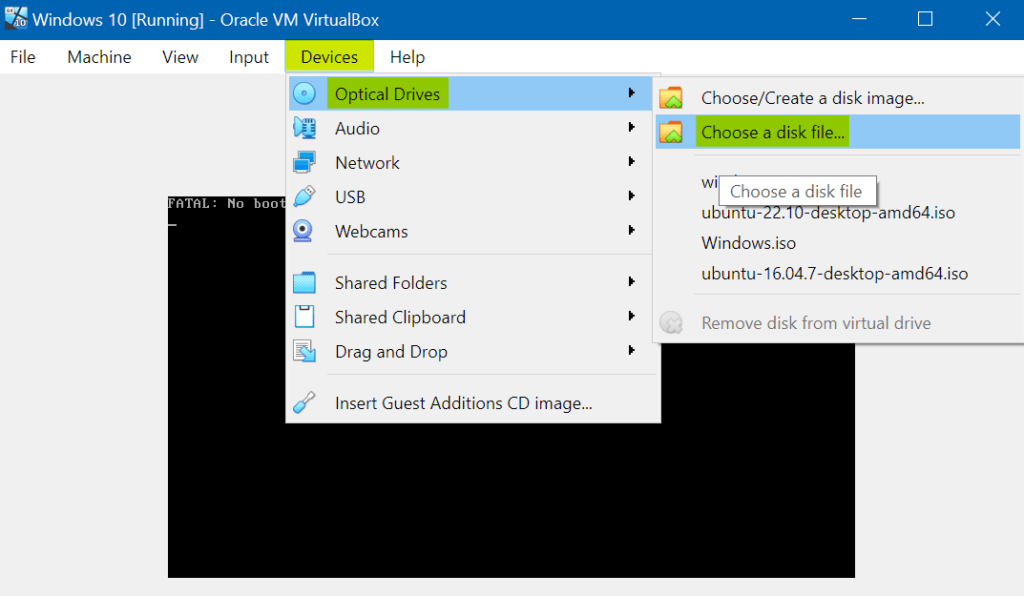
Start the machine and click on “Devices” > “Optical Drives” > “Chose a disk file…”
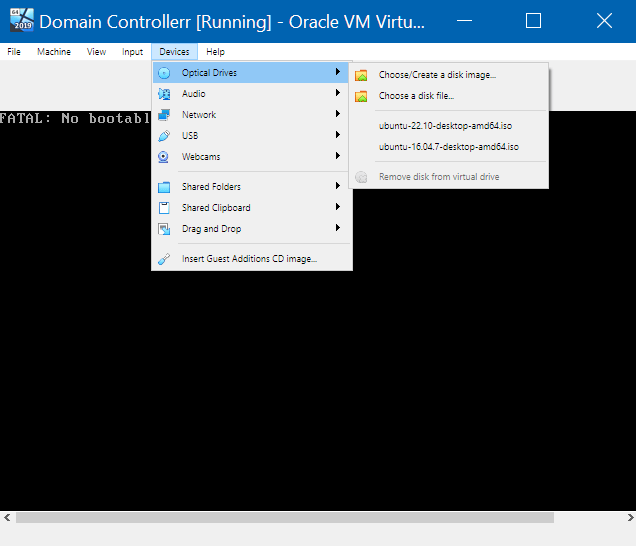
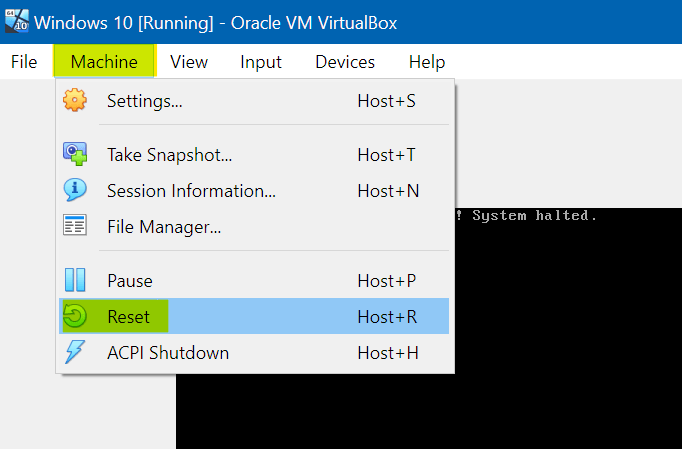
Then search for the iso file that you installed for the Windows server 2019. After thats been selected, click on “Machine” > “reset”
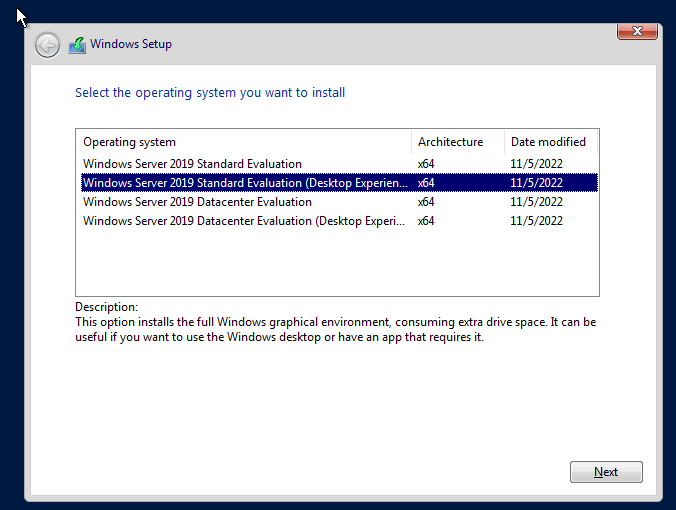
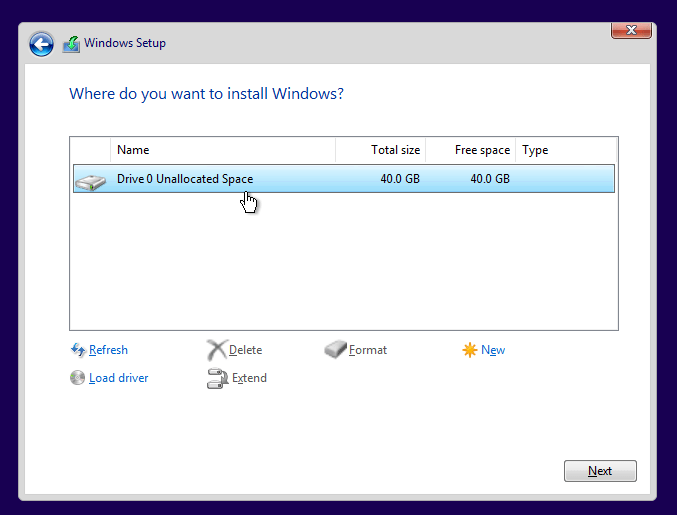
Go through the installation process till you get to this. Choose the second option here:
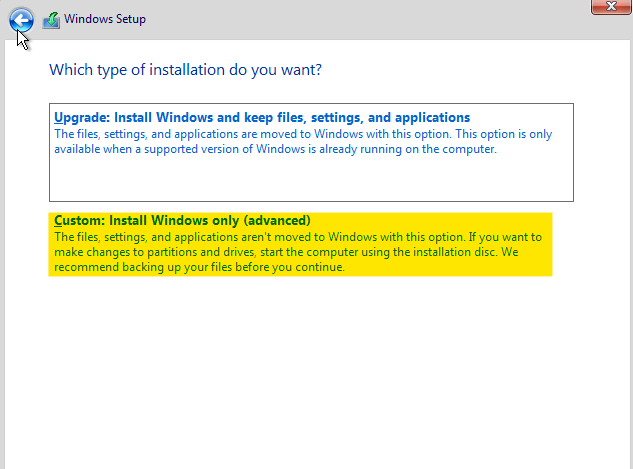
Keep going till you get to here. Click on Custom, then click next on the screen that comes up.
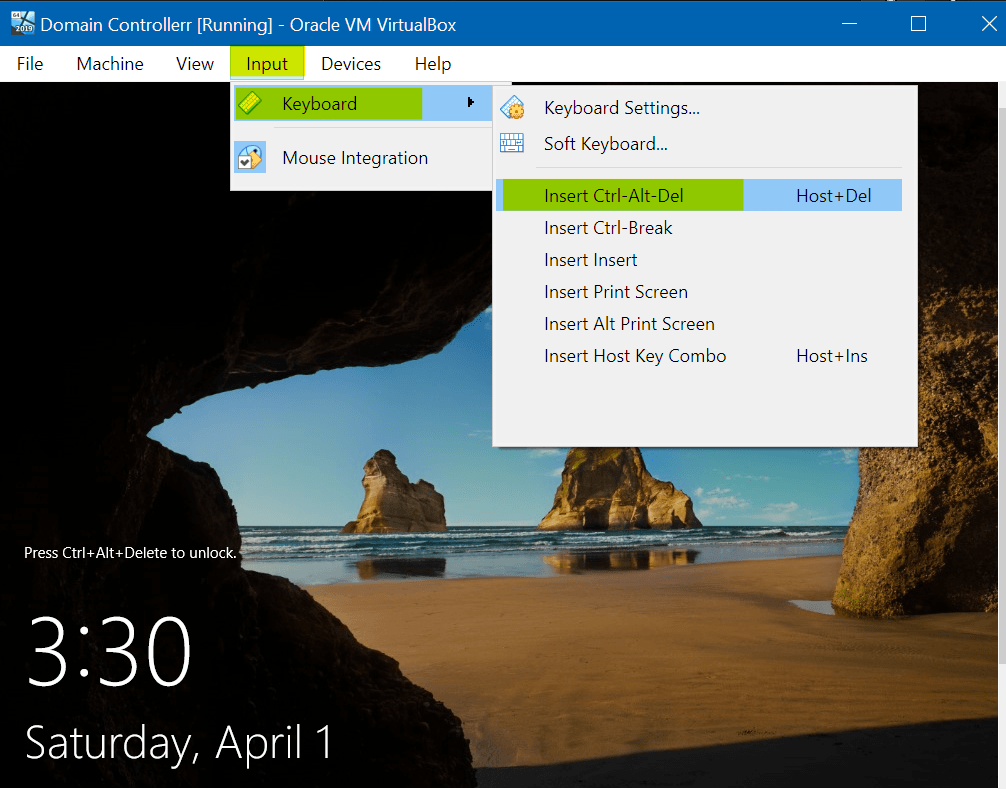
Once the installation process is done and you’ve created the Administrator account, you have to sign in.
Note: you need to press CTRL+Alt+Delete to sign in to Windows machines. The CTRL+Alt+Delete doesn’t register in the virtual machine and only works on the host machine. So in virtual box you can do CTRL+Alt+Delete by clicking “Input” > “Keyboard” > “Insert Ctrl + Alt + Del”
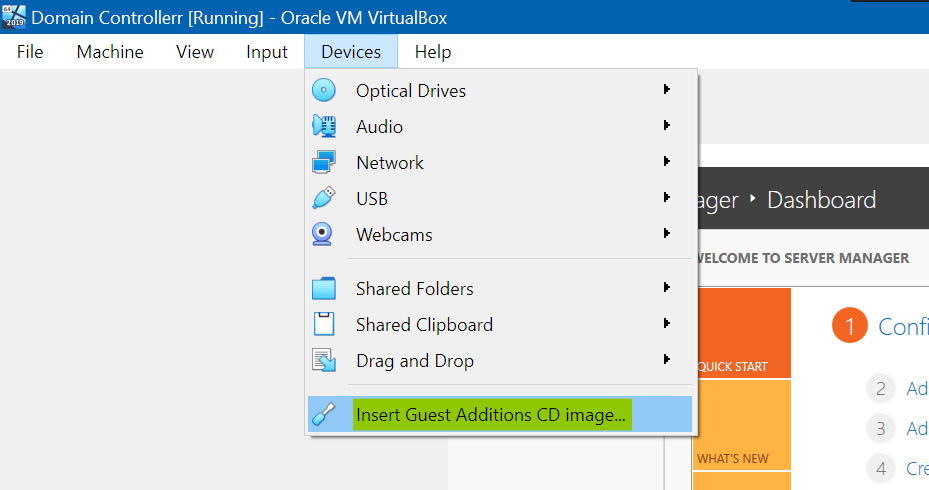
To get full screen, click Devices at the top of the machine, then click on “Insert Guest Additions CD image…”
Now click on file explorer and then click on “CD Drive (D:) VirtualBox” on the left. Then run the file “VBoxWindowsAdditions”
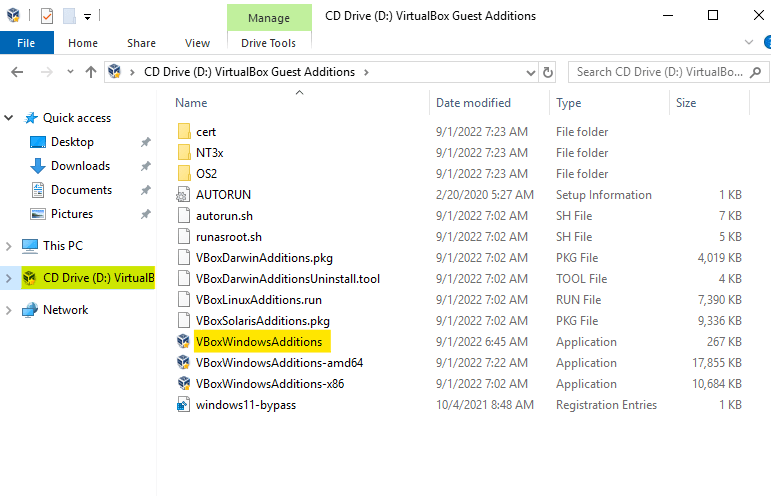
This should bring up an installer. Keep clicking next and install it. Once its done installing, reboot the machine.
I’d recommend renaming the Domain Controller so you can identify it on the network easier. To do this, hit the windows key and type rename. Then click on View your PC name
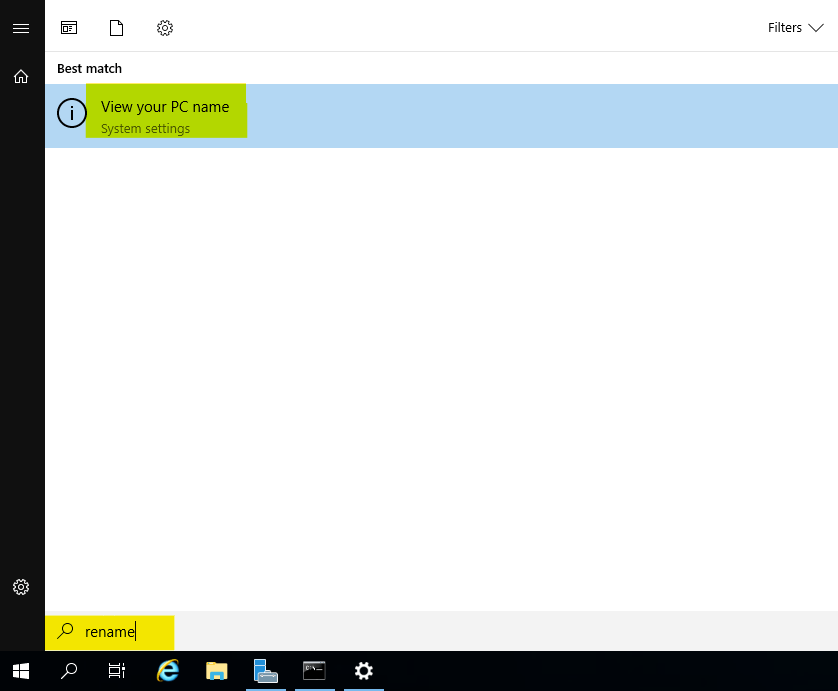
Now you can rename the Domain Controller so its easier to identify.

Make sure you restart the machine after changing the name.
Configuring the Domain Controller
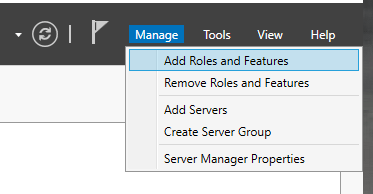
Open Server Manager and click Manage on the top right, then click Add Roles and Features
Keep clicking next until you’re brought to this. Here select “Active Directory Domain Services”. It should bring a pop-up, click on Add Features in the pop-up.
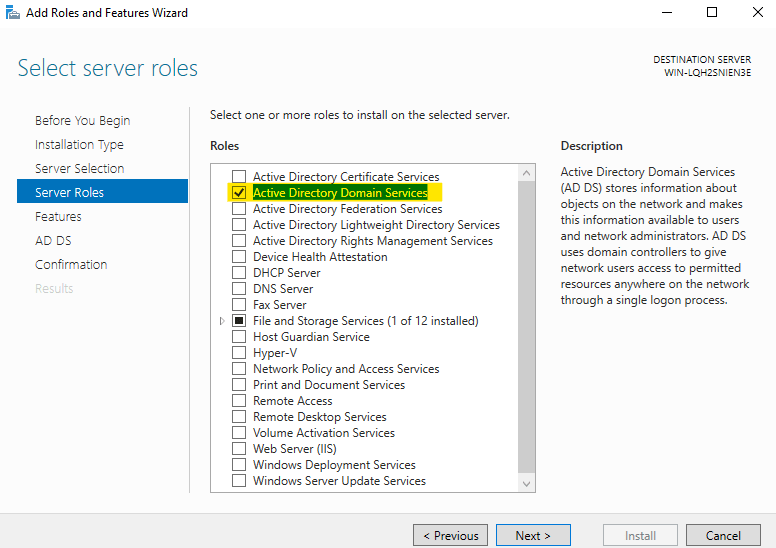
Keep clicking next and then click install
Once its done installing click this at the top and click “Promote this server to a domain controller”
Once it brings you to this screen, click “Add a new forest” and then choose a domain name. I choose WANDA.local
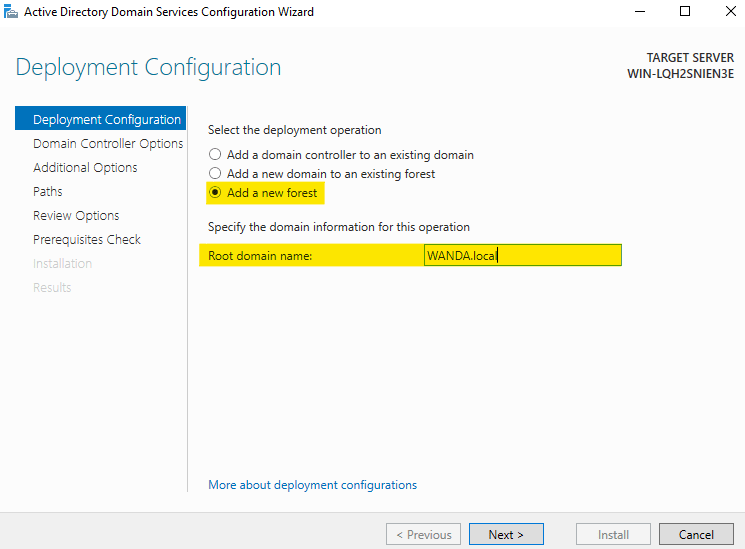

Don’t select “Create DNS Delegation” in the DNS Options, just click next
Keep clicking next and click install at the end. Once it restarts, you should have a domain controller.
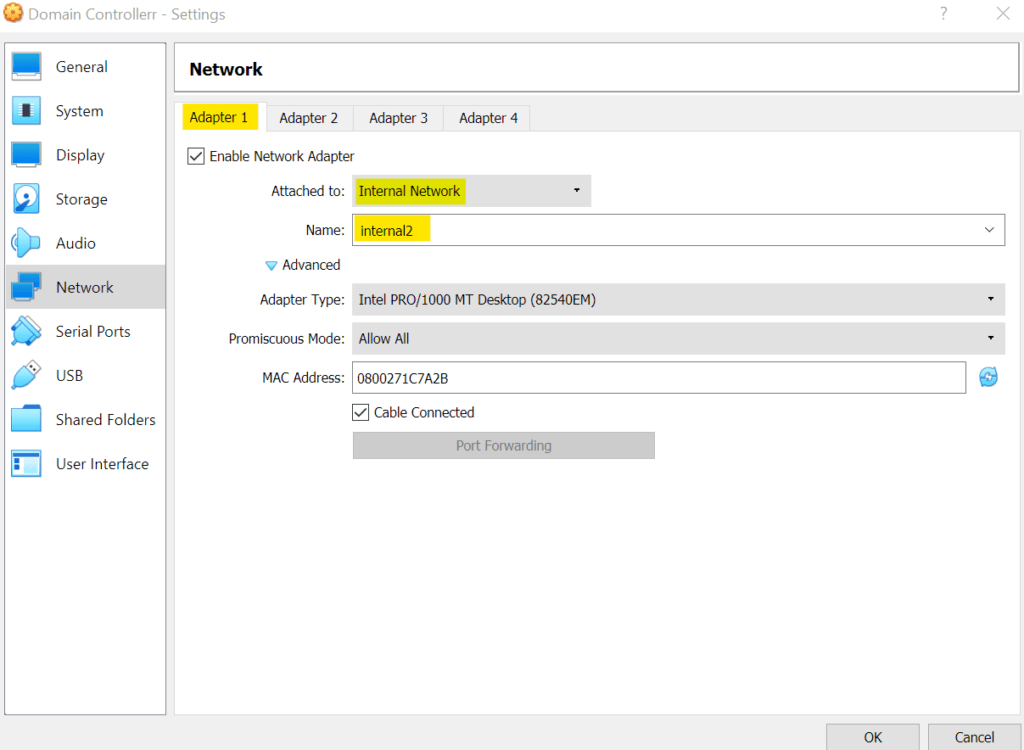
Network settings for the Domain Controller
Click on the domain controller in VirtualBox and then click on Settings. Then go to “Network” > “Adapter 1” and set it to “Internal Network”. The name should be the name of the SECOND internal network you created.
IP of the domain controller
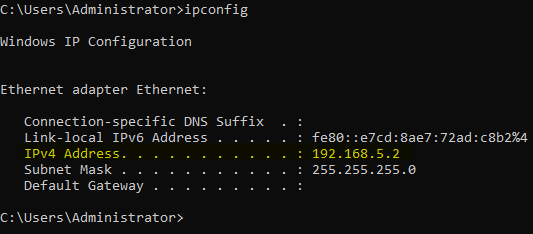
Note: Your IP might be different which is completely fine as long as it falls in the IP range that you gave your second internal network.
Windows 10
Downloading the iso is a little bit more complicated for Windows 10
First download the Windows 10 Installation media
Run the executable and accept the license
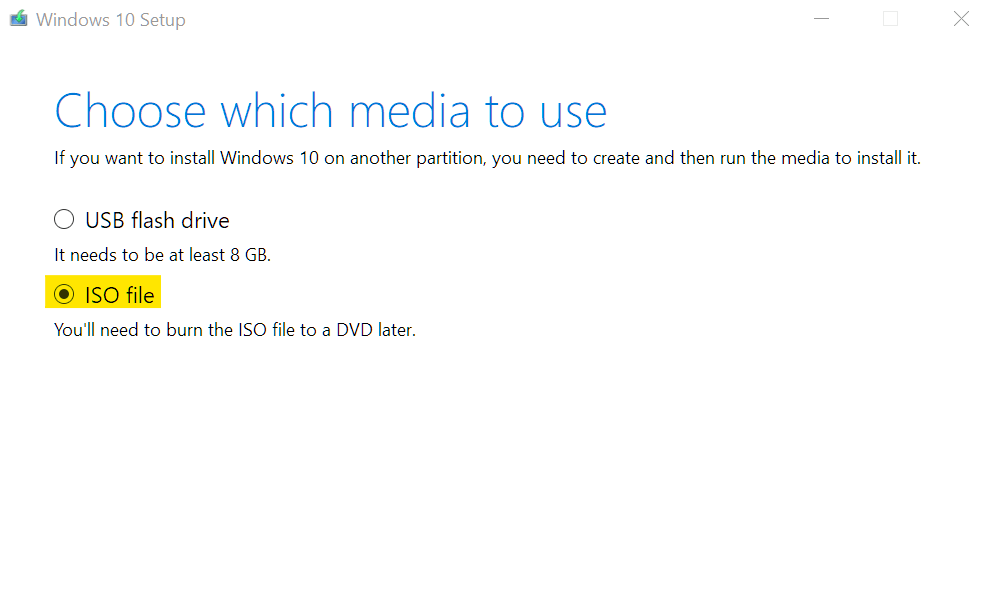
Make sure you choose “Create installation media”
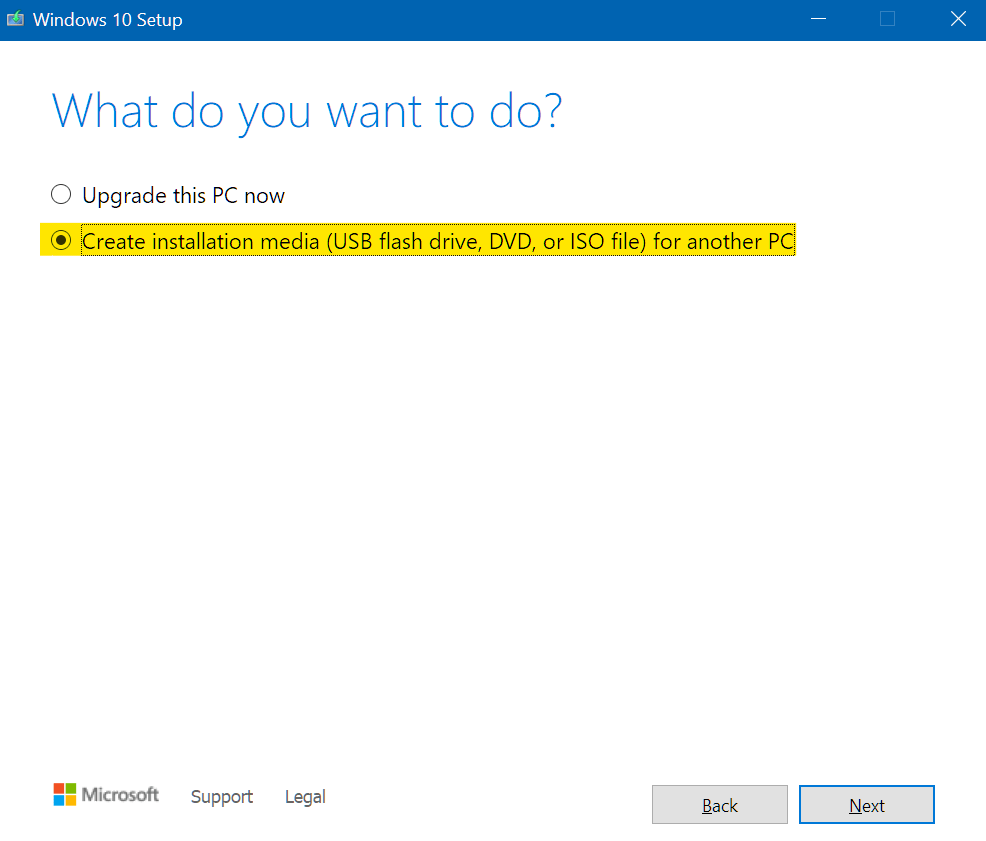
Once you get here, choose ISO file and install it.
Follow the same steps from the Domain Controller setup to get full screen on the Windows machine.
Next choose the RAM. I chose 4GB for setting up the machine. I like to set it to 2 when
Choose “Create a virtual hard disk now”
Select “VDI”
Select “Dynamically Allocated”
I set the storage to 40GB for now. This can always be increased later.
Now start the machine. Once its started you’ll need to put in the iso file. Go to “Devices” > “Optical Drives” > “Choose a disk file…” and then choose the Windows 10 ISO you previously installed
Once you’ve chosen the iso file, click Machine at the top and click reset
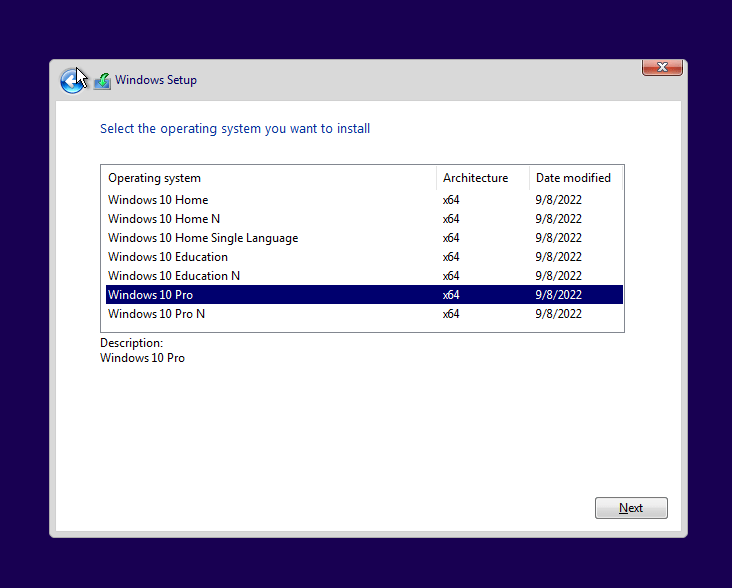
Go through the installation process and select “Windows 10 pro” here
Click on Custom here
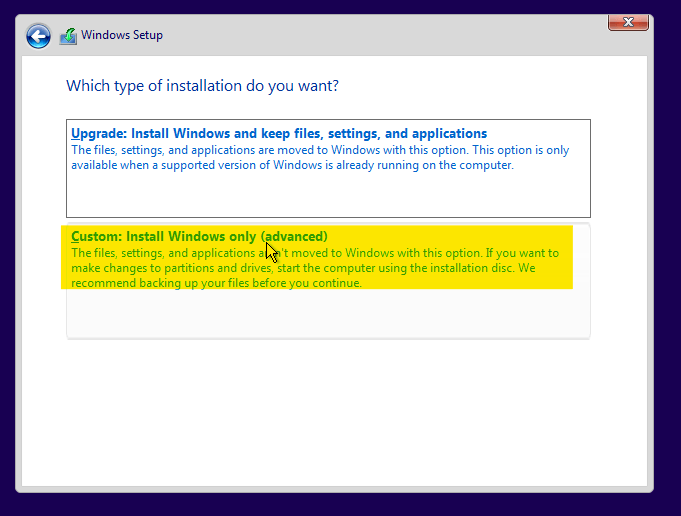
Then click next here
If you want to enable full screen, follow the same steps you did for the Domain Controller. Same goes for changing the name of the machine. I changed it to “Client1”.
Once you go thorough the Windows Setup, make sure to take a snapshot
Setting up the Network for Windows 10
Go to VirtualBox, click on the Windows 10 machine then click settings on the top right
Then select Network and set Adapter 1 to internal1
After that, go to Adapter 2 and set it to internal2
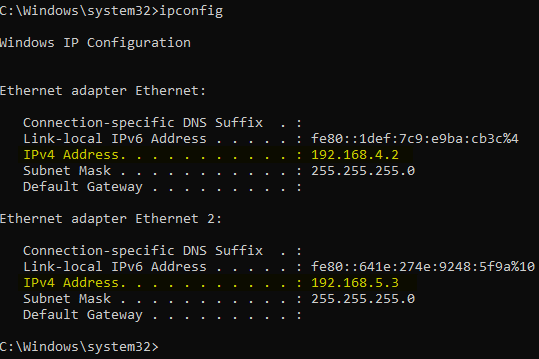
Check the Windows 10 IPs
Kali
Get the Kali ISO from here
On Virtual Box, create the machine
I set the RAM to 4GB for now
Select “Create a virtual hard disk now”
Choose VDI
Select “Dynamically Allocated”
I set the storage to 40GB for now
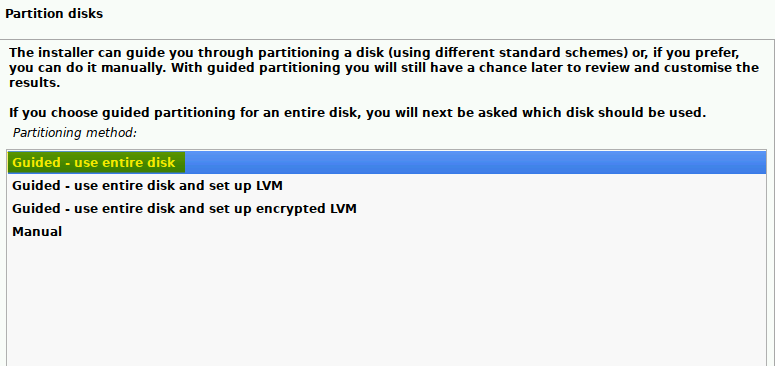
Now start it and insert the iso file. Go through the setup process till you get to here, then Click “Guided”
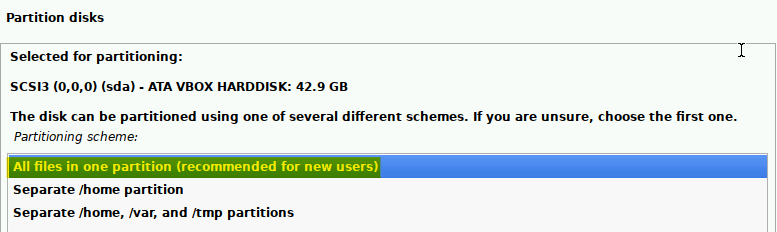
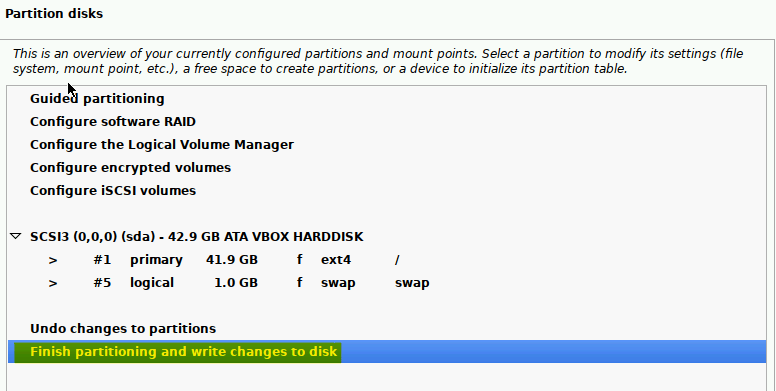
Click “All files in one partition”
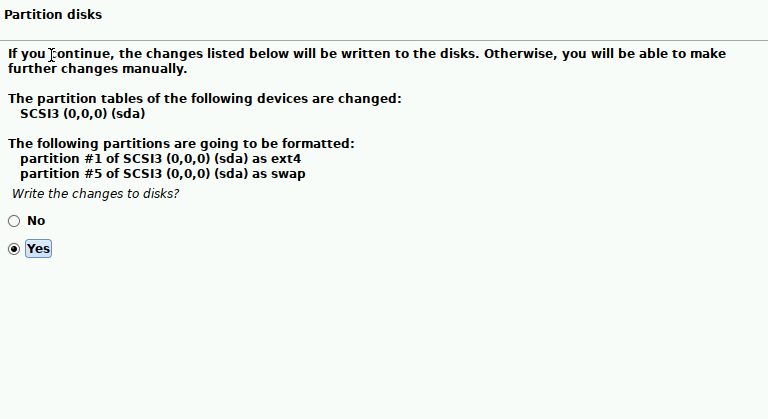
Click “Finish Partitioning and write changes to disk”
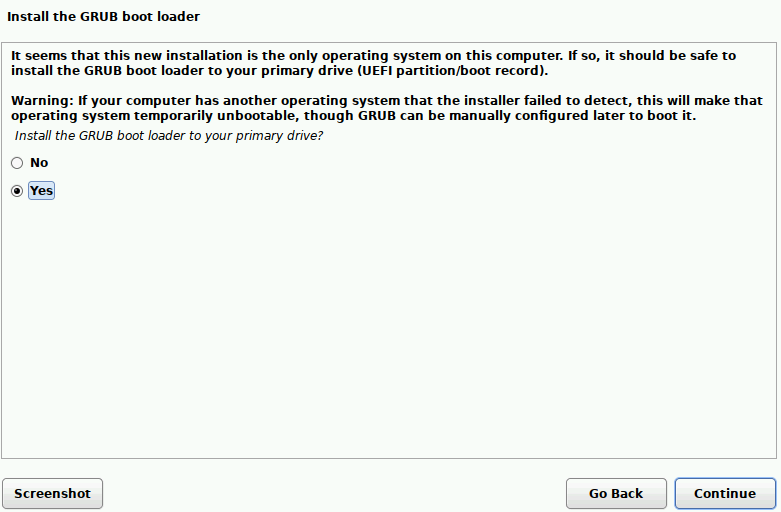
Select “Yes”
Select “Yes” here as well
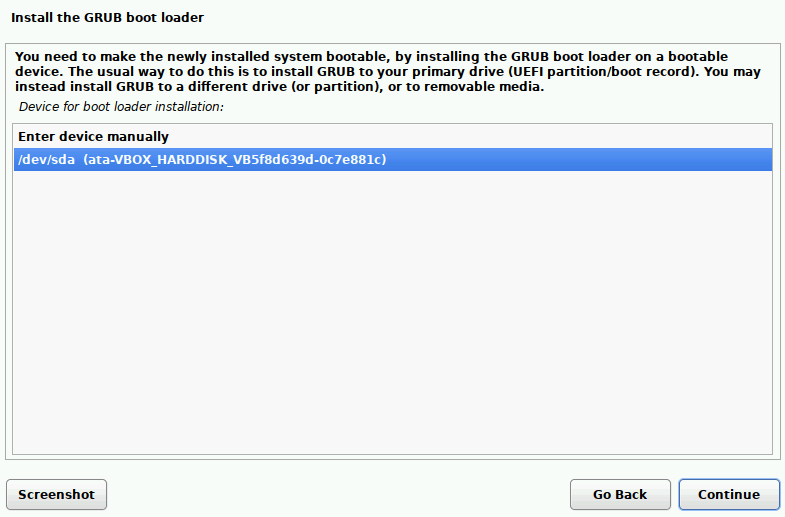
Then select /dev/sda
Take a snapshot of the machine
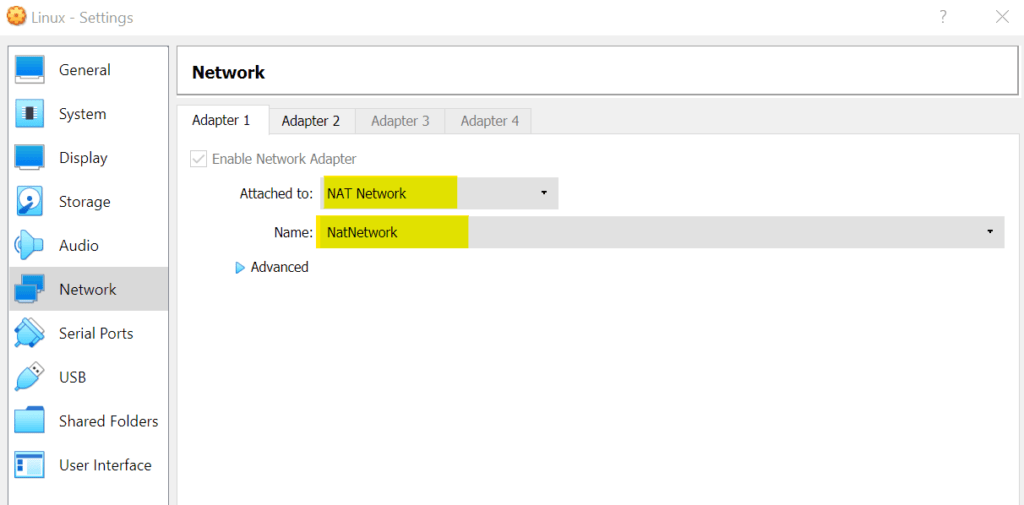
Setting the network for Kali
Go to VirtualBox and click on Kali. Then click Settings.
Click network and set Adapter 1 to Nat Network
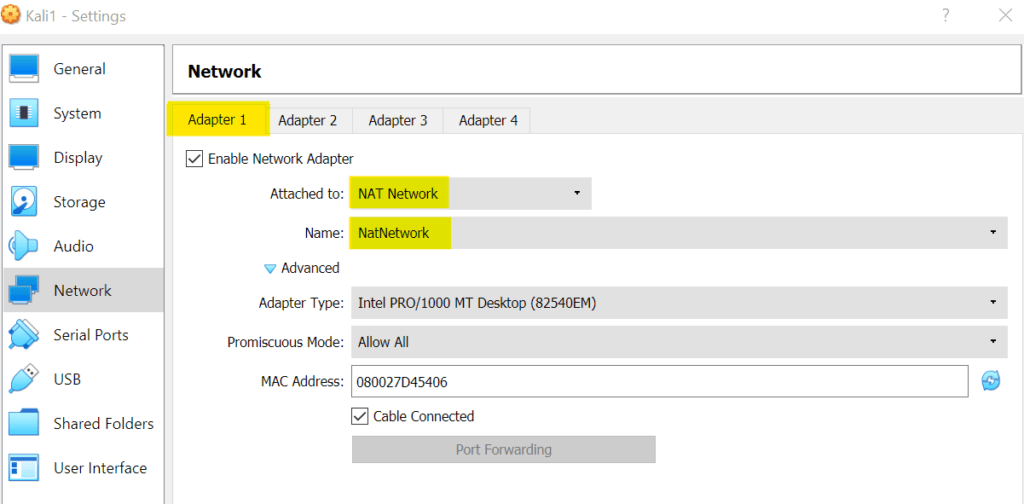
Then set Adapter 2 to Internal network 1
Adding the machines to Active Directory
Windows
Make sure you’ve configured the Domain controller before moving on to this step
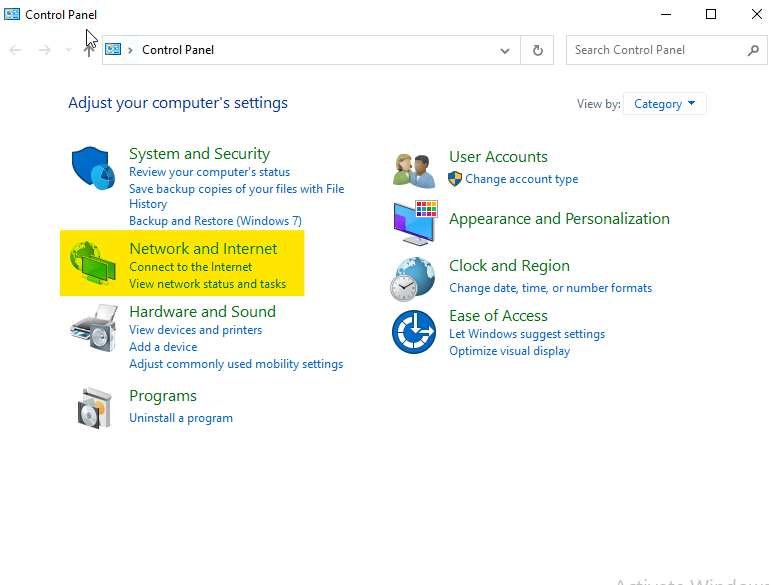
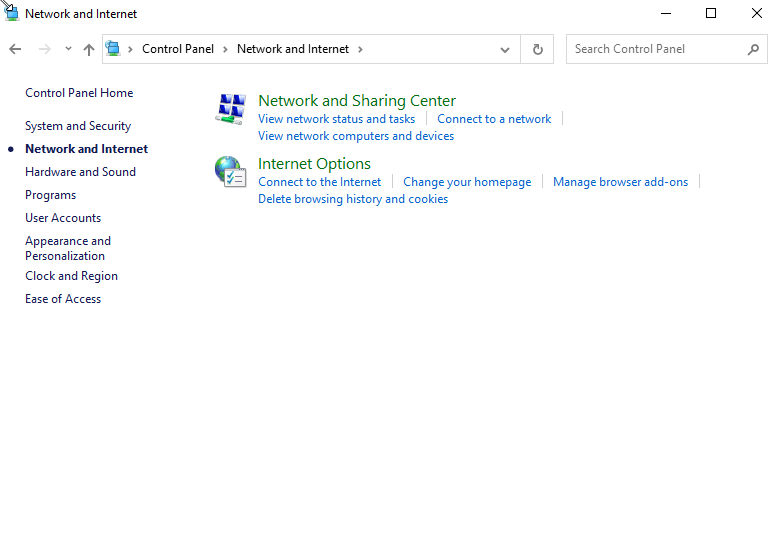
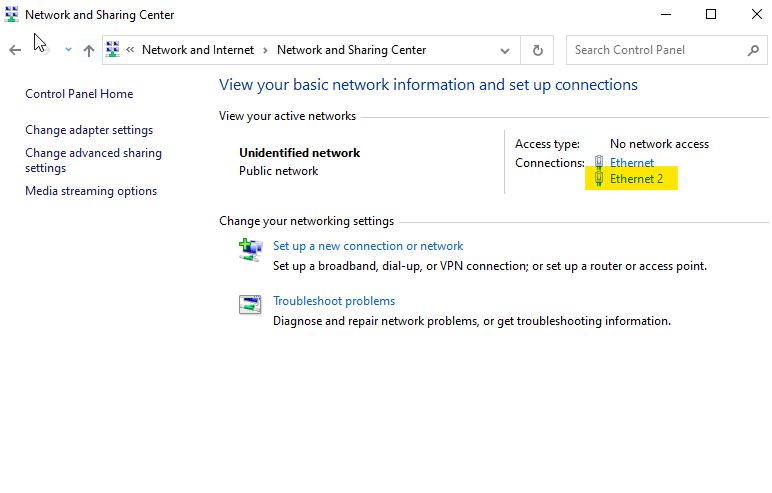
First we have to set the Domain Controller’s Ip to the DNS server in the Windows 10 machine. Go to the control panel and click on “Network and Internet”
Then click on “Network and Sharing center”
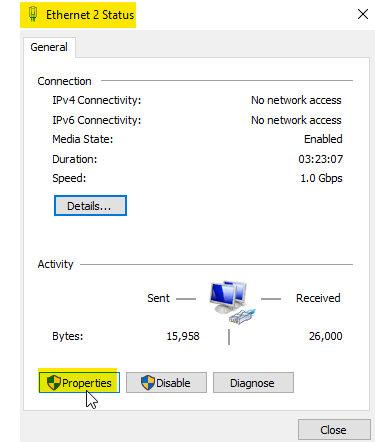
Then click “Ethernet 2”
Click properties
Then click on “Internet Protocol Version 4” and click Properties.
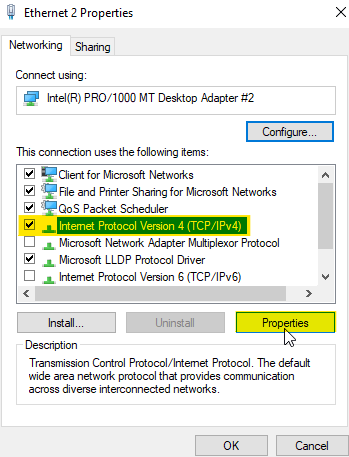
Then click “Use the following DNS server address:” and put in the ip of your domain controller.

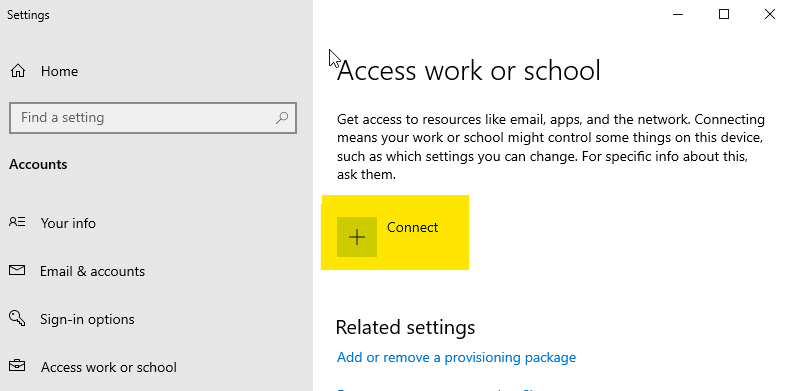
Now to join this machine to the Domain Controller, go to “Access work or school”
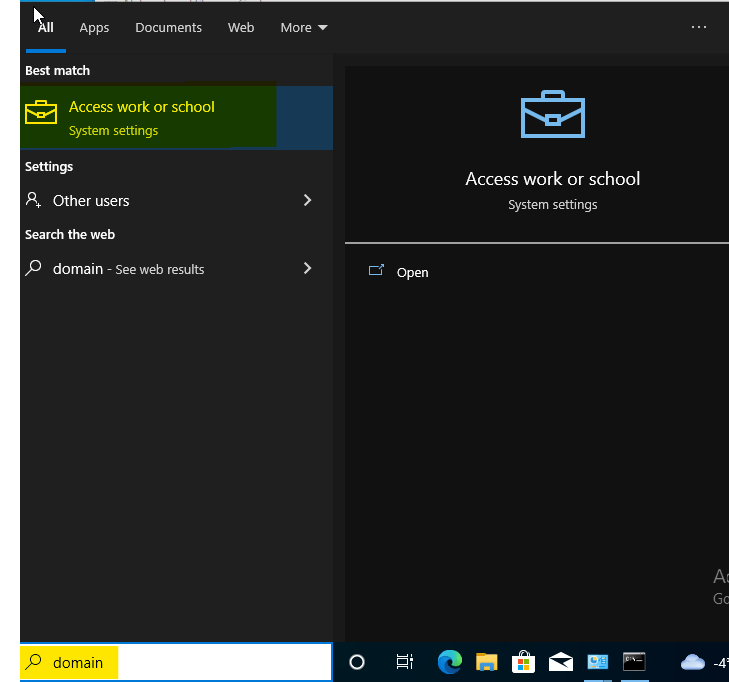
Click on “Connect”
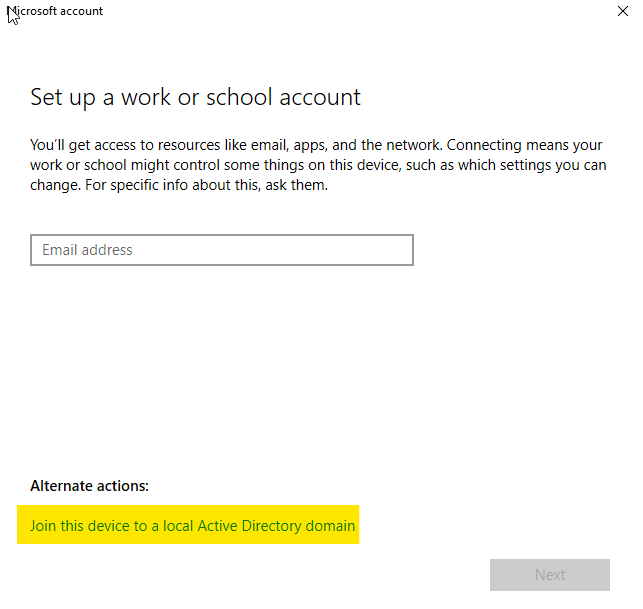
Then click “Join this device to a local Active Directory domain”
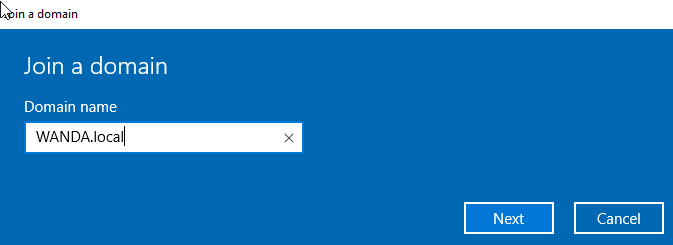
Enter the domain name that you specified when setting up the domain controller
Enter the Administrator credentials for the domain controller.
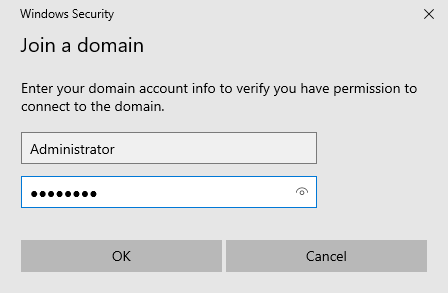
You can skip adding a user for now.
Linux
First, lets change the hostname of the Linux machine.

Now update the Ubuntu and also install realmd. We first need to change adapter 1 from “internal network” to “NAT Network” so we can get internet connection.
Restart your Ubuntu machine.
Then, update the Ubuntu machine:
sudo apt updateThen, install realmd:
sudo apt get realmdNow see if you can discover the domain controller
sudo realm discover 192.168.5.2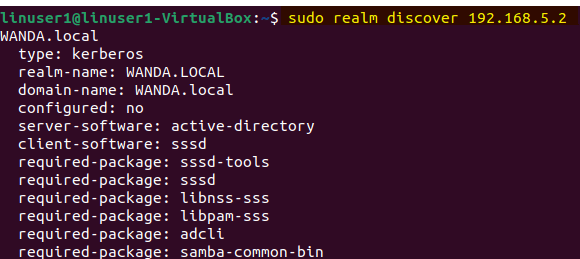
After that, join the domain.
sudo realm join -U Administrator 192.168.5.2
Test the network
If you want to confirm that both of the machines are in the domain, go back to the domain controller and open Server Manager. Then click on “Tools” and then click “Active Directory Users and Computers”
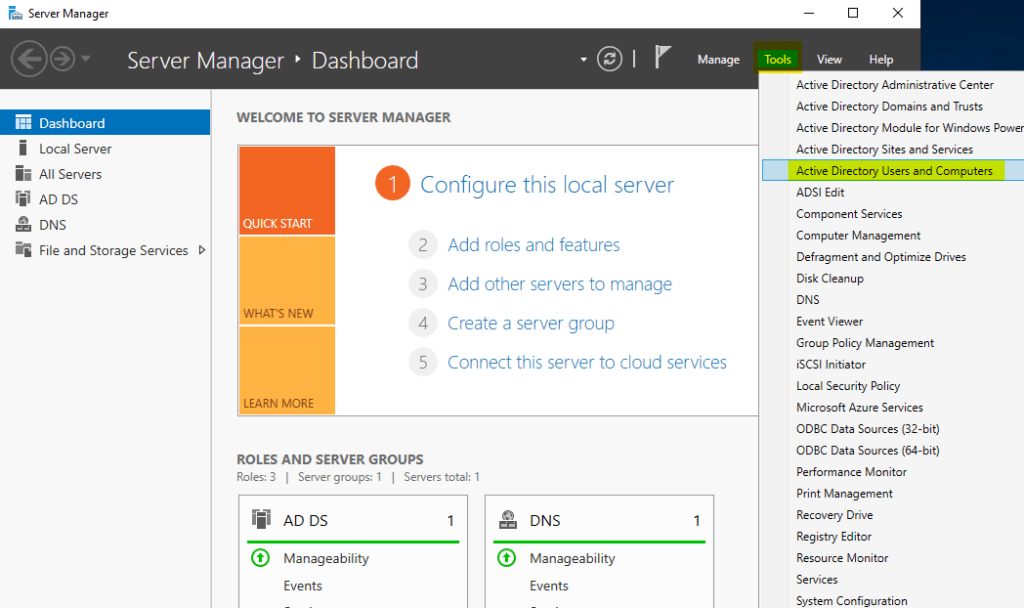
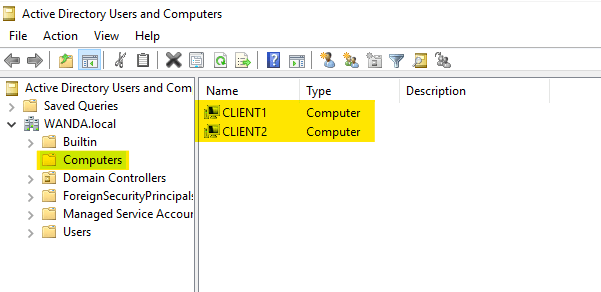
Then click on Computers. There you’ll see the CLIENT1 and CLIENT2 machines.
If you want to make sure the network is setup properly, get each of the machines to ping each other. The only ping that shouldn’t work is the one from Kali to the Domain controller or vice versa. If Kali and Ubuntu are unable to ping the Windows 10 machine, check the “Extra” section in this blog.
Extra
Enabling Pings on Windows 10
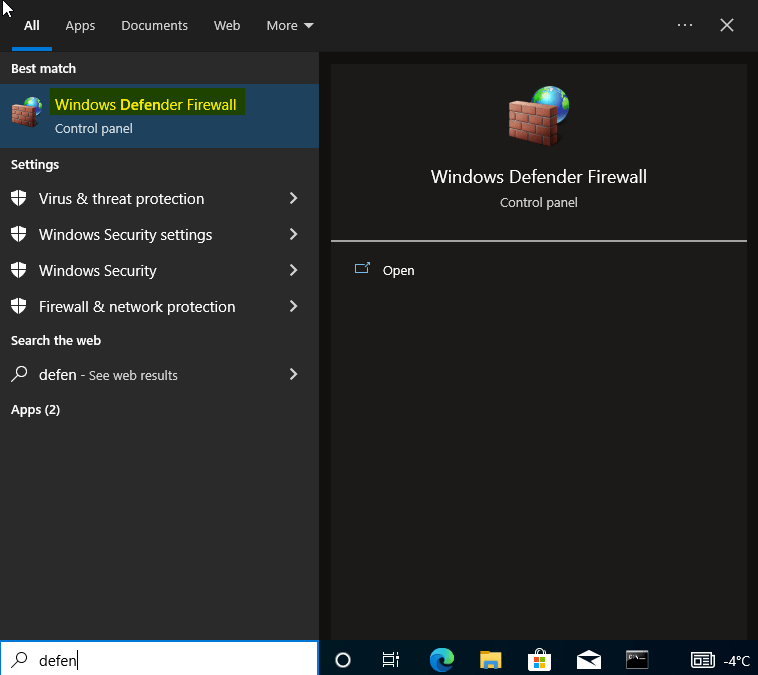
Navigate to “Windows Defender Firewall”
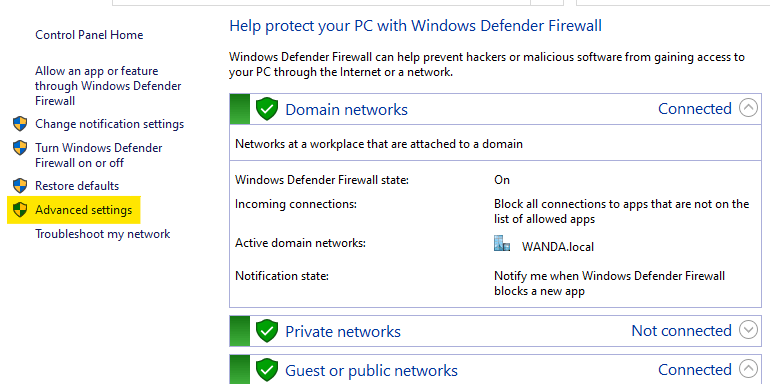
Then click on Advanced Settings
Click on “Inbound Rules” and then right click on both of “File and Printer Sharing (Echo Request) ICMPv4-IN” then hit “Enable Rule”
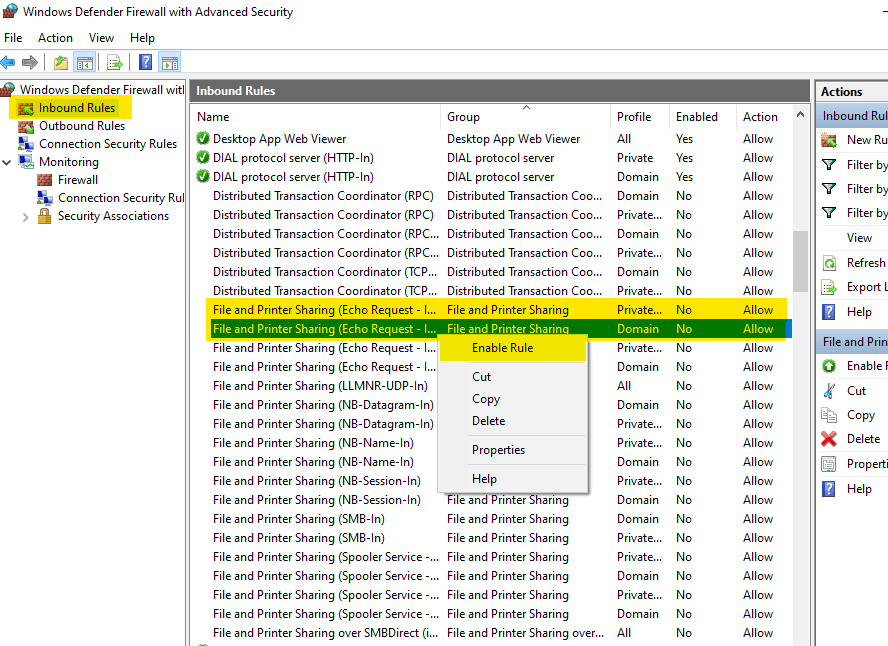
The Kali and Ubuntu machine should be able to ping the Windows machine now.
TCM has a good video on how to create an AD lab, if my walkthrough didn’t work be sure to check this out
Thanks for reading!
